


San Carlos 21 May 1982: Complete Field Guide — Landings, Order of Battle & Air Attacks // Log 011
San Carlos, 21 May 1982. This was the point at which Operation Corporate became a land campaign. After weeks of naval and air fighting, 3 Commando Brigade had to get ashore, establish a defensible lodgement and build enough combat power to move east towards Stanley — while Argentine aircraft attacked the ships sustaining the beachhead.
I served 12 years with The Royal Welsh as a mortarman, including operational service in Afghanistan. San Carlos immediately makes me look at the relationship between the people ashore and the firepower, ammunition, helicopters, ships and air defence behind them. A landing is not complete when the first rifle company reaches the beach. It is complete when the force can survive, resupply, communicate and begin the next operation.
For the sovereignty dispute, South Georgia crisis, Argentine junta, British government and diplomacy before the campaign, read Log 009 — The Political Road to War. For the whole campaign in sequence, see Log 010 — Complete Falklands Campaign Guide.
At a glance
- Date: 21 May 1982, with consolidation and air attacks continuing over subsequent days.
- Operation: Operation Sutton.
- Location: San Carlos Water and Port San Carlos, western East Falkland.
- British amphibious commander: Commodore Michael Clapp.
- British landing force commander: Brigadier Julian Thompson RM, 3 Commando Brigade.
- Argentine local ground force: Combat Team Güemes, built around troops from Infantry Regiments 25 and 12.
- Immediate result: British beachhead established successfully.
- Main danger: repeated Argentine air attacks against warships, landing ships and support vessels in and around Falkland Sound and San Carlos Water.
Why San Carlos was chosen
The British needed a landing site that offered shelter for ships, usable beaches, room to assemble a brigade and some distance from the main Argentine concentration around Stanley. San Carlos Water offered all of those advantages.
It was also on the western side of East Falkland, meaning the landing force would still have to cross difficult country to reach Stanley. That was the trade. Land close to the main Argentine force and face stronger immediate ground opposition, or land farther away in a relatively lightly defended area and accept a major movement and logistics problem afterwards.
Special Forces reconnaissance helped confirm that the area was not occupied by a large Argentine formation. It was not undefended, however. Argentine Army patrols had detected signs of British activity, and Combat Team Güemes had been placed in the area before the landing.

The political and operational lead-up
By 21 May, diplomacy had failed to stop the confrontation. The Task Force had retaken South Georgia, the Argentine cruiser General Belgrano had been sunk, HMS Sheffield had been lost and both sides understood that a major amphibious landing was likely if Britain intended to recapture the islands.
The British operational requirement was now unavoidable: establish troops ashore before winter, preserve enough ships to sustain them, then turn the beachhead into an advance on Stanley.
Argentina’s problem was different. Its main ground forces were concentrated around Stanley and Darwin/Goose Green. The air forces on the mainland therefore became the principal means of attacking the amphibious force during the vulnerable landing phase.
British order of battle: the landing force
The core of 3 Commando Brigade at San Carlos included:
- Brigade HQ — Brigadier Julian Thompson RM.
- 40 Commando Royal Marines — Lieutenant Colonel Malcolm Hunt.
- 42 Commando Royal Marines — Lieutenant Colonel Nick Vaux.
- 45 Commando Royal Marines — Lieutenant Colonel Andrew Whitehead.
- 2nd Battalion, The Parachute Regiment — Lieutenant Colonel Herbert “H” Jones.
- 3rd Battalion, The Parachute Regiment — Lieutenant Colonel Hew Pike.
- 29 Commando Regiment Royal Artillery — 105 mm light-gun support.
- 59 Independent Commando Squadron Royal Engineers.
- Commando Logistic Regiment and medical, signals, air-defence and other attachments.
- Brigade Air Squadron and attached Army Air Corps helicopters.
The amphibious ships and merchant vessels included HMS Fearless, HMS Intrepid, SS Canberra, MV Norland, RFA Stromness and the Round Table-class landing ships carrying vehicles, stores and heavy equipment.
Argentine local defence: Combat Team Güemes
Argentine Army sources describe a small local force in the San Carlos area under Lieutenant First Class Carlos Daniel Esteban. It included troops from Company C, Infantry Regiment 25 and a supporting section associated with Infantry Regiment 12. One detachment occupied high ground at Fanning Head — known in Argentine accounts as Height 234 — while other troops operated around San Carlos settlement.
The force was never large enough to stop a brigade landing by itself. Its realistic military value was early warning, local resistance and the ability to report the landing so that air and higher headquarters could react.
Night 20–21 May: the amphibious group enters
The amphibious force moved into Falkland Sound and San Carlos Water under darkness. Naval gunfire and Special Forces actions supported the approach and attempted to reduce local threats.
For a landing force, the most dangerous moment is often the transition between ship and shore. Troops are split between vessels, landing craft and beaches; heavy weapons and vehicles are not yet organised; command posts are moving; and the ships are concentrated in predictable water.
San Carlos succeeded because the British achieved the crucial first requirement: most of 3 Commando Brigade got ashore before Argentina could mount a major ground response.
Fanning Head: the first ground fighting
The Argentine position on Fanning Head overlooked approaches to the landing area. Special Boat Service personnel and naval gunfire engaged the position in the early hours. Argentine troops resisted and then withdrew rather than be cut off.
Argentine Army accounts emphasise the small detachment’s attempt to delay the landing force and the subsequent withdrawal east. British accounts emphasise the need to remove a position capable of observing and firing into the anchorage. Both perspectives point to the same tactical truth: even a small group on commanding ground can matter enormously during an amphibious operation.
The landing beaches
The brigade was distributed across several landing areas to prevent congestion and give each battalion room to establish its task:
- 2 PARA landed around San Carlos and moved towards Sussex Mountain to protect the southern side of the bridgehead.
- 40 Commando landed at San Carlos.
- 3 PARA landed near Port San Carlos and secured northern ground.
- 45 Commando landed around Ajax Bay.
- 42 Commando came ashore as part of the wider brigade lodgement and subsequent consolidation.

Ajax Bay rapidly became important for logistics and medical support. The old refrigeration plant was converted into a field surgical facility, later remembered as the “Red and Green Life Machine”. That tells you something about a beachhead: warehouses, tracks and pieces of civilian infrastructure become military terrain as soon as supplies and casualties start flowing through them.
The Argentine air response
Once the landing was detected, the main battle shifted into the air and onto the ships. Argentine Air Force and Naval Aviation aircraft flew at very low level to reduce warning time and attack vessels concentrated in the sound.
The surrounding hills helped the attackers. Radar and shipborne missile systems had less time to detect, classify and engage aircraft appearing low over land. The same geography that sheltered the amphibious force from the open South Atlantic therefore made the inner anchorage dangerous in another way.
For Argentine pilots, the mission was also exceptionally demanding: long flights from mainland bases, low-level navigation, limited time over the target, intense anti-aircraft fire and a requirement to recover with little fuel margin.
21 May chronology
After midnight: British amphibious ships enter the San Carlos area. Supporting actions begin against local Argentine positions.
Early hours: fighting develops around Fanning Head/Height 234. British landing craft begin putting battalions ashore.
Morning: brigade units establish defensive positions north and south of the anchorage. Combat Team Güemes reports the landing and withdraws from the immediate area as British strength grows.
Morning onwards: Argentine aircraft begin a series of attacks. Pucarás operate locally from the islands while A-4 Skyhawks, Daggers and Naval Aviation aircraft attack ships from mainland and island bases.
During the day: HMS Argonaut, HMS Antrim, HMS Broadsword and other vessels are hit or damaged. Unexploded bombs cause serious problems on several ships.
Afternoon/evening: HMS Ardent is repeatedly attacked and fatally damaged. She later sinks.
By nightfall: the British have a large force ashore and the landing itself has succeeded, but it is clear that sustaining the beachhead will require ships to continue operating under heavy air threat.
Why bombs that failed to explode still mattered
Several Argentine bombs penetrated British ships without detonating, often because the very low release height did not give their fuzes enough time to arm correctly. This reduced British losses, but it did not make the attacks harmless. A large unexploded bomb inside a warship can immobilise the ship, threaten magazines or machinery spaces and force dangerous disposal work.
The technical detail mattered strategically. Had a higher proportion of bombs detonated, the amphibious force might have lost significantly more ships during the critical landing period.
“Bomb Alley”
San Carlos Water became known to British sailors as Bomb Alley. That phrase can make the event sound almost cinematic. It is worth remembering what it meant operationally: ships had to stay close enough to protect and sustain troops ashore while knowing that the geography gave incoming aircraft only a short exposed run before weapon release.
Warship crews therefore became part of the ground campaign. Their ability to absorb attacks, continue unloading and provide air defence directly determined whether Thompson’s brigade could build combat power ashore.
What was happening on land while the ships were being attacked?
The battalions ashore were digging in, patrolling, establishing communications and moving guns, ammunition and stores from the beaches. Engineers improved routes and prepared positions. Rapier air-defence systems had to be landed, moved and made operational. Medical facilities had to be established before the major land battles began.
This is one reason San Carlos cannot be reduced to “the Royal Navy under air attack”. The naval battle and beachhead construction were the same operation viewed from different positions.
Political pressure and the next move
The bridgehead existed, but the spectacle of ships being hit created pressure in London for visible progress ashore. National Army Museum analysis notes that this formed part of the context in which commanders were pushed to establish “moral and physical domination” over the enemy.
The nearest substantial Argentine force to the beachhead was at Darwin and Goose Green. The military rationale for dealing with it — remove a force south of the lodgement and an airstrip that could threaten operations — existed alongside the political desire to demonstrate momentum.
That connection is developed in Log 012 — Battle of Goose Green.
First-hand and contemporary perspectives
British accounts from San Carlos repeatedly emphasise the contrast between the relative calm ashore and the violence on the water. Soldiers could watch aircraft attack the ships that had brought them in. Sailors, meanwhile, were fighting a battle in which their job was not simply to survive but to keep the logistical route open.
Argentine official accounts emphasise the determination of pilots attacking heavily defended ships and the actions of Combat Team Güemes against a vastly larger landing force. Those sources are particularly useful when compared with British after-action histories because they show what the defenders believed they had achieved, what they thought they were facing and how information moved back to Argentine headquarters.
What I notice through a mortarman’s lens
The beach is only the start line. A mortar detachment ashore without bombs, communications or a route for resupply is not meaningful combat power. Every weapon system has a tail behind it.
Observation was layered. Naval radar, air observers, troops on Fanning Head, Special Forces patrols and battalion OPs were all trying to build different parts of the same picture.
Ground shaped air defence. The hills around the anchorage were useful concealment for ships but also masked approaching aircraft. Terrain does not belong to one domain.
Unloading priorities become tactical choices. Rapier systems, artillery ammunition, medical stores and vehicles all compete for landing craft and deck space. What gets ashore first changes what the brigade can do next.
Fire support depends on survival at sea. Naval guns could support troops only while the ships carrying them remained operational. The infantry and the fleet were physically tied together.
Casualties and losses
The 21 May attacks cost lives on both sides. HMS Ardent was lost with 22 crew killed. Other British ships were damaged and British aircraft and helicopters were also lost during the wider fighting.
Argentina lost several aircraft and aircrew on 21 May. Exact daily tallies differ among sources because aircraft were engaged by Sea Harriers, ship missiles, guns and ground systems across a wide area and some early claims were later revised.
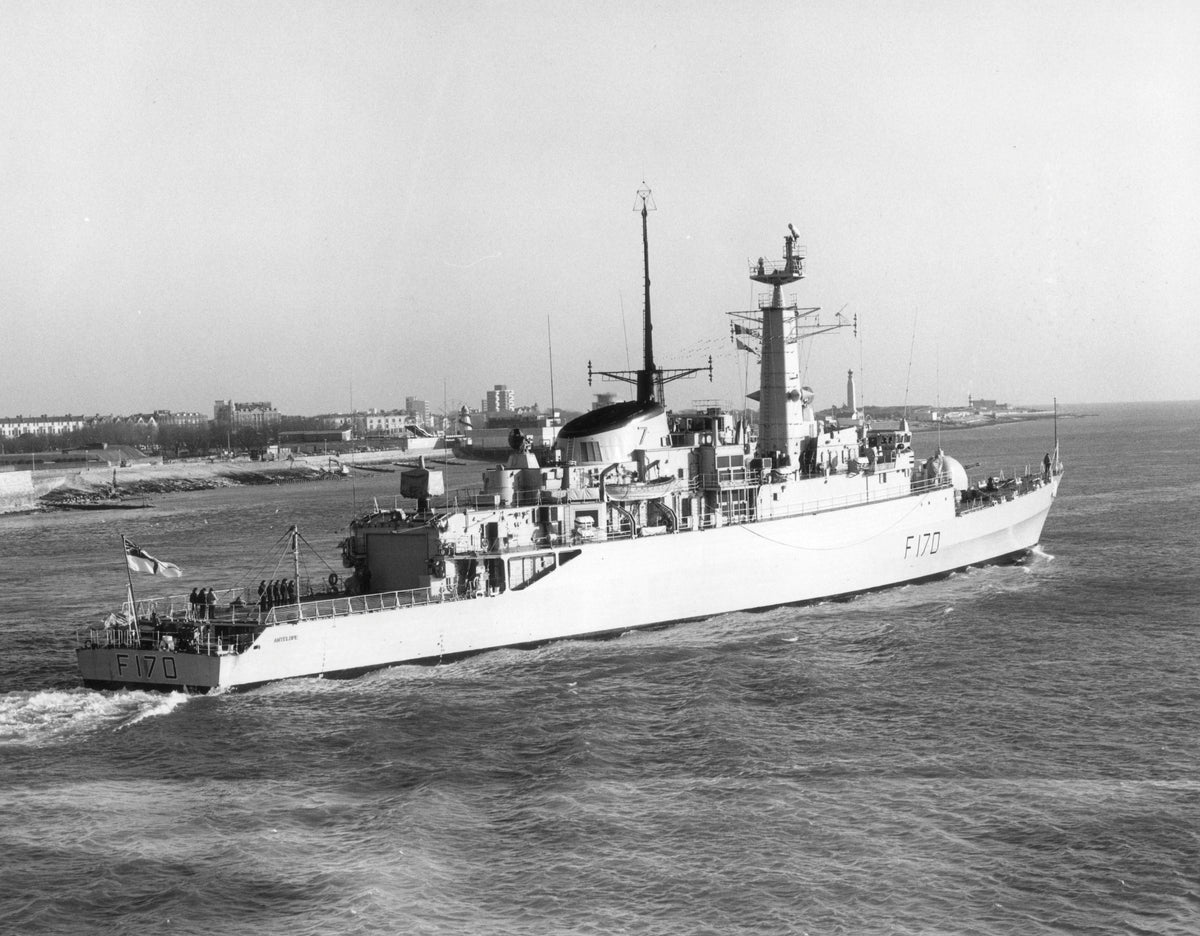
The wider San Carlos phase continued after the first day. HMS Antelope was lost after an unexploded bomb detonated during disposal work; HMS Coventry was sunk on 25 May; Atlantic Conveyor was also lost that day. The beachhead survived, but the cost of keeping it open was substantial.
The result
San Carlos was an operational British success because the fundamental objective was achieved: a brigade-sized force was landed and sustained ashore. Argentina’s air forces inflicted serious losses but did not prevent the lodgement.
Once the beachhead survived, the character of the war changed. Britain now had a land force on East Falkland. The question became not whether it could land, but how quickly it could turn west-coast lodgement into pressure on Stanley before ships, weather, distance and winter imposed a higher cost.
Wear the geography
- East Falkland 1982 Map T-Shirt
- Falkland Islands 1982 Map T-Shirt
- Operation Corporate: Falklands 1982 Veteran T-Shirt
Browse the complete Falklands War collection.
Sources & further research
- National Army Museum — The British Army and the Falklands War
- Naval-History.Net — San Carlos landings and task organisation
- Argentine Army — San Carlos account
- Argentine Air Force Historical Studies — operations on 21 May
- US State Department — contemporary 21 May landing report
- RAF Air Historical Branch — Falklands operational study
- Falkland Islands battlefield guide — San Carlos and surviving sites
- Julian Thompson, No Picnic; Martin Middlebrook, The Falklands War, 1982; Lawrence Freedman, The Official History of the Falklands Campaign, Volume II.
I cross-check attack claims and aircraft/ship damage between British and Argentine material because contemporary claims on both sides were often made before complete information was available.
