


HMS Ardent 21 May 1982: Complete Field Guide — Bomb Alley, Naval Gunfire & the Type 21 Frigate

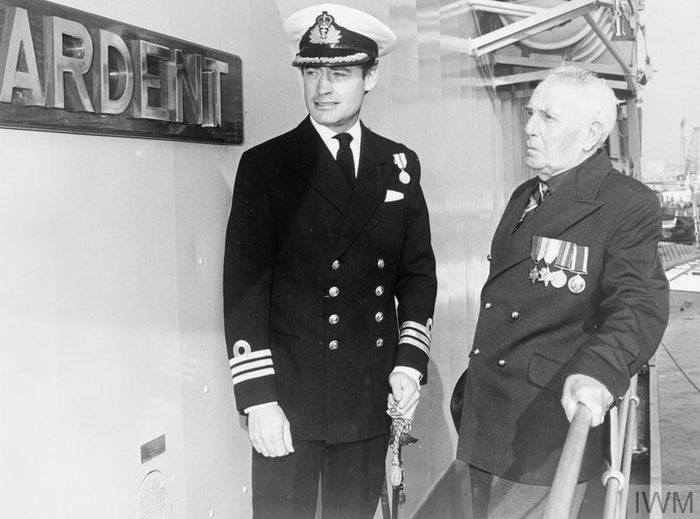
21 May 1982. HMS Ardent entered the San Carlos battle already tired from a demanding mission: naval gunfire support around Goose Green and the approaches to the British landings.
By evening the Type 21 frigate had been hit repeatedly by Argentine aircraft. Seven bombs struck her during the day. Twenty-two men were killed and dozens wounded. Her crew fought the fires until there was no realistic way to save the ship.
Ardent became the Royal Navy's heaviest single ship loss of life in the 1982 conflict.
At a glance
- Date: 21 May 1982.
- Ship: HMS Ardent (F184), Type 21 frigate.
- Commanding officer: Commander Alan West RN.
- Role: naval gunfire support and protection of the amphibious force.
- Attacker: repeated Argentine Air Force and Naval Aviation strike aircraft.
- Bomb hits: seven during the day's attacks.
- Dead: 22.
- Wounded: 37 in the official-history account of the final sequence.
- Result: ship abandoned and lost after uncontrollable fire and battle damage.

Why Ardent was where the air war was fiercest
Operation Sutton put the British landing force into San Carlos Water on 21 May. The ships protecting the beachhead had to operate close to land, inside the practical radius of Argentine mainland aircraft.
Some escorts were used as gunfire ships. Others guarded the amphibious vessels. In both cases they were deliberately exposed so that the troop and supply ships could unload.
Ardent spent part of the day on naval gunfire support. That placed her outside the innermost shelter of San Carlos and along routes Argentine pilots were already using to attack the landing force.
Read San Carlos 21 May 1982 — Complete Field Guide →
Bomb Alley was a system, not one place
The phrase “Bomb Alley” is usually attached to San Carlos Water, but the tactical problem extended across Falkland Sound and the approaches.
Argentine aircraft came in low over West Falkland, crossed the water at high speed and attacked ships with only seconds of warning. The terrain concealed them from radar until late. The British answer combined Sea Harriers, ship missiles, Rapier, guns and small arms.
None of those layers was perfect on its own.
First attacks
During the day Argentine raids repeatedly penetrated the British screen. Some attackers were intercepted by Sea Harriers; others reached the ships.
By late afternoon Ardent had already been moved into the mainstream of the air attacks after completing gunfire tasks.
The official history records a Skyhawk attack around 1600Z that missed Ardent. Sea Harriers arriving too late to prevent that strike then intercepted other A-4s and shot down two.
1755Z: the attack that crippled the ship
At about 1755Z three Argentine Naval Aviation A-4s found Ardent southwest of the North West Islands.
The frigate's Sea Cat launcher failed to fire. Three bombs hit; two exploded.
The ship was ordered to close San Carlos Water. By then she was already badly damaged, with weapons and systems falling out of action.
Explore this history
Continue from this Field Note into the closest Gallus campaign and military-history collection.
The second wave
Another A-4 wave then struck the damaged frigate and caused further bomb damage and casualties.
Sea Harriers directed by HMS Brilliant intercepted the attackers after bomb release and destroyed all three aircraft in that wave.
This is one of the hard truths of the San Carlos air battle: attackers could be shot down and still complete a lethal attack. Air defence had to stop the aircraft before weapon release to protect the ships.
Seven bomb hits
By the end of the sequence seven bombs had hit Ardent. The frigate was listing, steering was gone and most of her weapons were unavailable.
The official history records that even the 4.5-inch gun lost power and Sea Cat was out of action. Small arms became part of the final defence.
One of the men firing at the incoming Skyhawks was NAAFI canteen officer John Leake, a former Army regular, who took over a machine gun.
“Take off my men”
The ship's company fought the fires, but the damage spread beyond what could be contained.
Alan West eventually signalled HMS Yarmouth to remove his crew.
The Royal Navy later quoted him recalling the physical violence of the bombing: it felt as if a giant had seized the ship by the stern and smashed her down onto the sea.
The twenty-two
Twenty-two men died aboard HMS Ardent.
That was the highest loss of life on a single Royal Navy ship during the 1982 war.
Remembering the ship only as a damaged Type 21 misses the human scale of the day: ratings working in machinery spaces, weapon compartments, the operations room and damage-control parties were hit in a battle fought at point-blank range by modern aircraft and conventional bombs.
Falklands War Dead — Roll of Honour & Remembrance →
Why so many Argentine bombs failed elsewhere — and why Ardent was different
One of the defining features of the Falklands air war was the number of Argentine bombs that struck British ships without detonating.
The official history records the fuse problem from the Argentine perspective: pilots needed enough delay that bombs would not explode beneath following aircraft, but not so much that low-level release gave the fuze too little time to arm before impact.
On Ardent, enough bombs did detonate to create catastrophic damage. The ship therefore illustrates the scale of damage that the Argentine raids could have produced more often had the fuze problem been solved earlier.
The Argentine cost
Argentine pilots paid heavily for pressing their attacks. Sea Harriers engaged aircraft before and after the strikes and several attackers were lost.
The bravery of those pilots and the effectiveness of some attacks can be stated without pretending the campaign was tactically efficient. The low-level method was extraordinarily dangerous, and some formations reached their targets only to lose aircraft on the way out.
Argentine Air War 1982 — aircraft, tactics and losses →
Why Ardent matters
Ardent shows what the escorts were being asked to do at San Carlos. The amphibious force had to survive long enough to unload thousands of troops and tonnes of ammunition, guns, vehicles, fuel and food.
The escorts put themselves between the attackers and that vulnerable mass of shipping.
Some paid for it with damage. Ardent paid for it with the ship and twenty-two lives.
The Iron Standard conclusion
The loss of HMS Ardent was not proof that British air defence was absent. Argentine aircraft were being intercepted and destroyed throughout the day.
It was proof that “mostly effective” is not enough when even one surviving formation can put several bombs into a frigate.
San Carlos was a battle of attrition conducted in minutes and seconds: aircraft trying to cross the missile and fighter screen, escorts trying to keep them away from the landing ships, and damage-control teams dealing with whatever got through.
Ardent was one of the ships that absorbed that pressure so the beachhead could survive.
Related Falklands Field Notes
Return to the Falklands War 1982 complete campaign guide →
Continue exploring
Sources & further reading
- Lawrence Freedman, The Official History of the Falklands Campaign, Volume II — attack sequence, bomb hits, casualties and air-defence context.
- Michael Clapp & Ewen Southby-Tailyour, Amphibious Assault Falklands — amphibious-force and San Carlos perspective.
- Royal Navy — San Carlos landings anniversary — official remembrance and Alan West's account.
