


Gold Beach D-Day 1944: British Landings, Le Hamel & the Road Inland — Complete Field Guide
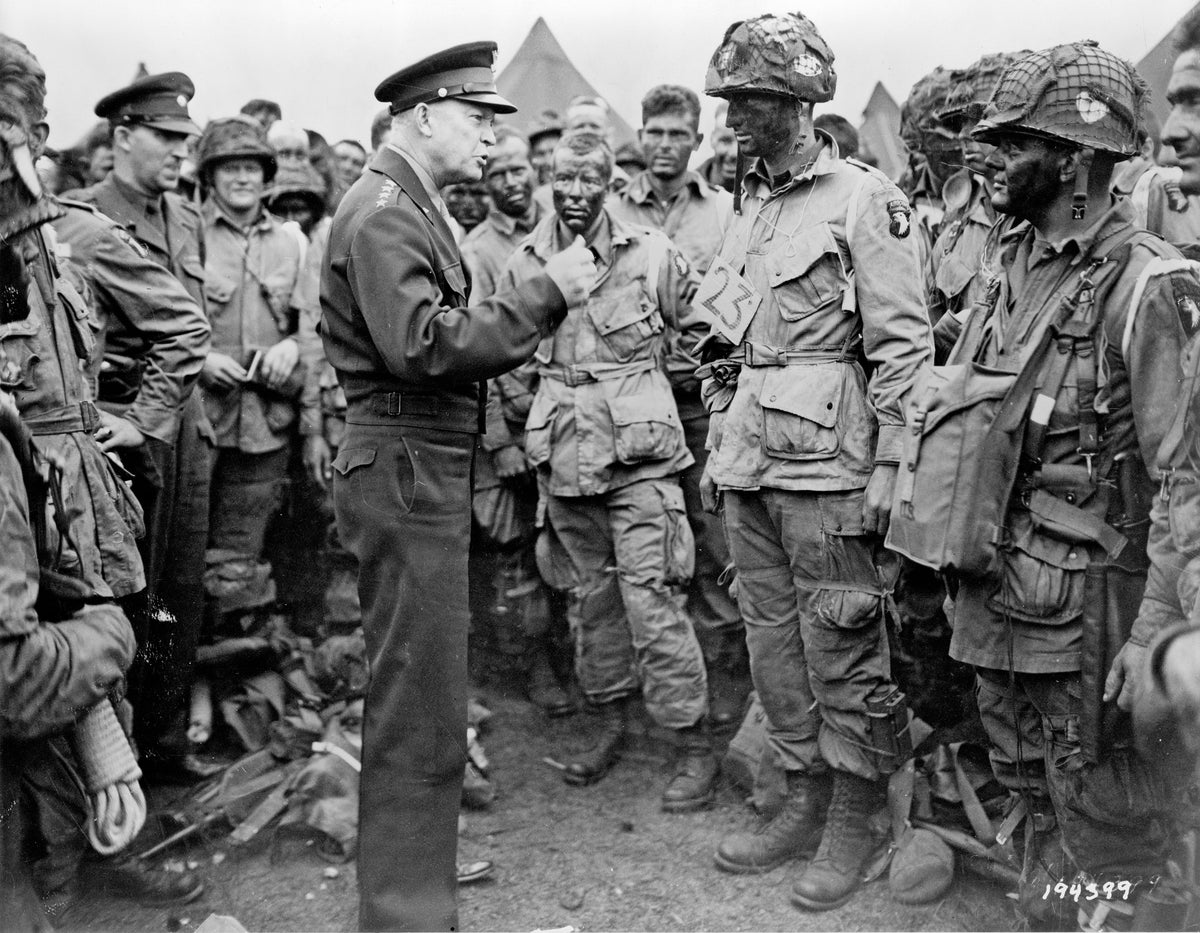
Field Note 055 · Revision 5
For the men coming in on Gold Beach, D-Day did not begin with a clean cinematic horizon and a neat line of landing craft. It began in a rough Channel, in cramped craft, with men cold, wet and badly seasick before the shooting even started. Some had spent hours trying not to be sick over the side. Then the ramps came down and the practical problems changed in an instant: water deep enough to drag at equipment, mines and steel obstacles underfoot, machine-gun fire from positions that had survived the bombardment, and the need to get off a narrow beach before the tide swallowed what little working space the engineers had.
Gold is sometimes described as one of the more successful D-Day beaches. That is true if the measure is the size and depth of the bridgehead by nightfall. It can also hide what the success cost. The 50th (Northumbrian) Infantry Division and the attached armour, engineers, gunners, sailors and commandos had to break several quite different defensive systems, clear exits, fight through villages and strongpoints, and keep moving inland while the assault plan was already being changed by events.
This Field Note looks at Gold from the waterline inland: the plan, the German defence, King and Jig sectors, the specialist armour, Le Hamel, Stan Hollis VC, 47 Royal Marine Commando and the march toward Port-en-Bessin, the Longues-sur-Mer battery, casualties, myths and what was actually achieved by the end of 6 June 1944.
Gold Beach in the wider invasion
Gold was the centre beach of the five main Allied landing areas. Omaha lay to the west, Juno to the east. The assault force belonged to Lieutenant-General Gerard Bucknall's XXX Corps, with Major-General Douglas Graham's veteran 50th (Northumbrian) Division as the principal landing formation. The division had already fought in France, North Africa and Sicily. It was not being sent in as an untested formation.
The wider plan is covered in Operation Overlord 1944: The Road to D-Day, while the relationship between all five beaches is set out in D-Day 6 June 1944: Five Beaches Complete Field Guide. Gold's particular job was to help make those separate landings into one lodgement.
The main objectives were ambitious. The division had to establish a secure beachhead, push toward Bayeux and the Bayeux-Caen road, link east with the Canadians from Juno, and help open the western connection toward the Americans. Attached 47 Royal Marine Commando had a specific mission beyond the beach: move west and capture Port-en-Bessin, the small harbour that would become important for fuel and for linking the British and American sectors.
Where Gold actually was
Gold covered roughly eight kilometres of coast centred on the villages around La Rivière, Ver-sur-Mer, Asnelles and Le Hamel. The assault was concentrated principally on two named sectors, King in the east and Jig in the west. The ground mattered. Strongpoints were concentrated around the coastal villages and exits, while the centre was less densely fortified but included marshy ground. Behind the sea wall were orchards, villages, sunken roads and hedged fields that gave defenders good cover once the fighting moved inland.
That means there was no single "Gold Beach experience". A Green Howard on King, a Hampshire fighting into Le Hamel, a Royal Engineer clearing an obstacle belt and a Royal Marine Commando trying to recover after losing landing craft were fighting different local battles inside the same operation.
The assault force
The first assault rested on two brigade groups.
- 69th Infantry Brigade Group attacked on King sector. Its assault battalions included the 5th East Yorkshire Regiment and 6th Green Howards, with 7th Green Howards in reserve. Supporting armour included DD Sherman tanks of the 4th/7th Royal Dragoon Guards, flail tanks of the Westminster Dragoons, AVREs of 6th Assault Regiment Royal Engineers and Centaur close-support tanks of the Royal Marines Armoured Support Group.
- 231st Infantry Brigade Group attacked on Jig. Its main infantry included 1st Dorsets and 1st Hampshires, with DD Shermans of the Sherwood Rangers Yeomanry, specialist armour and engineer teams. No. 47 Royal Marine Commando was attached on this flank for the Port-en-Bessin mission.
Follow-on formations included 151st Infantry Brigade, 56th Infantry Brigade and armour intended to drive the operation beyond the immediate coastal belt. Behind the fighting troops came beach groups, medical personnel, signals, provosts, anti-aircraft detachments, recovery crews, transport and the huge logistics system needed to turn a captured strip of sand into an army's supply base.
That administrative tail matters. Landing an infantry battalion is one thing. Keeping tens of thousands of men moving inland while ammunition, fuel, water, anti-tank guns, radios and vehicles are still coming ashore is another.
The German defence
Gold straddled the boundary between two German formations. In the eastern part of the sector were troops associated with the 716th Infantry Division, including coastal and Ost units. The western end was strengthened by elements of the 352nd Infantry Division, particularly I Battalion, Grenadier Regiment 916. That mattered because 352nd Division was a better field formation than the static troops the Allies expected to dominate the coast.
The defences were not one continuous concrete wall. They were a network of mutually supporting strongpoints, weapons pits, minefields, obstacles and field positions built around useful ground: villages, beach exits, road junctions and higher ground. At Le Hamel and around the King-sector strongpoints, machine-gun and anti-tank positions could survive bombardment because crews were underground or in well-concealed concrete and earthworks.
The war diary of 1st Hampshires is unusually blunt about this. It records that the aerial bombardment had not been as effective as expected and that German machine-gun nests survived aerial, naval and artillery fire by using underground, concealed and well-built positions. That is a useful corrective to the idea that shore bombardment should automatically have flattened a defended beach.
Before H-Hour: naval and air fire
As the assault craft closed the shore, bombers, cruisers, destroyers, landing craft fitted with guns and rockets, and field artillery firing from landing craft struck coastal positions. The volume was enormous. Its effect was uneven.
Some positions were suppressed or damaged. Others were not. Smoke and dust also obscured targets. A bunker could be hit without its occupants being killed; a gun could be temporarily silenced and then resume firing once the barrage lifted. The problem for the assault infantry was simple: if even a small number of machine guns and anti-tank weapons remained working, they could dominate exposed ground in front of them.
The naval contribution continued after the first wave. Warships were not simply part of a dramatic opening bombardment. They remained a source of responsive heavy fire against batteries and strongpoints as the battle developed ashore.
King sector: the 6th Green Howards come in
The 6th Green Howards war diary gives a rare battalion-level clock on the assault. At 06:35, as the armada approached the French coast, the men could see flashes along the shore as aircraft attacked coastal targets. At 07:10 A, B, C and D Companies and Battalion Headquarters were in their LCAs making the run to the beach through a sea the diary described as unsuitable for such an important landing.
The diary gives H-Hour as 07:35. At 07:37 A and D Companies assaulted. A Company went against a fortified strongpoint and D Company attacked heavily concreted positions around Mont Fleury. Both were reported as successfully stormed with surprisingly low casualties. By 10:00 most of the battalion was ashore and moving toward its reorganisation area. By midday Phase I had been completed and the battalion was pushing toward Crépon.
Those few diary entries show why broad statements about Gold can mislead. On part of King, the plan worked remarkably well. Assault companies landed close enough to where they were meant to be, armour and specialist vehicles were available, and strongpoints were knocked out quickly enough for momentum to build.
Stan Hollis VC
Company Sergeant Major Stanley Hollis of 6th Green Howards became the best-known individual soldier on Gold. His Victoria Cross was gazetted on 15 August 1944. He is widely described as the only man awarded the VC for actions carried out on D-Day itself.
The useful way to tell the story is not to turn Hollis into a solitary action-film character. His actions made sense inside the battalion battle. The Green Howards were trying to break through defended positions quickly enough that the whole brigade could maintain momentum. Hollis attacked a German position near Mont Fleury and later took further action around Crépon when his company was again checked by enemy fire.
Whatever the later retellings add, the central fact remains: a senior NCO repeatedly moved toward positions holding up his men, under direct fire, and helped break them. His VC is important because it shows how much the success of an apparently well-run assault still depended on individuals making violent, immediate decisions at very short range.
Jig sector: a harder opening
West of King, the fight on Jig was rougher. The 1st Hampshires landed east of Le Hamel. Their diary records surviving German machine-gun nests, mines, a narrow beach and heavy casualties. The battalion still forced the defenders back, captured Le Hamel and Asnelles-sur-Mer, then continued toward Arromanches and Tracy-sur-Mer.
That summary compresses hours of fighting. Le Hamel in particular became one of the stubborn points on Gold. The German position was strong enough, and the approach sufficiently exposed, that the timetable slipped badly. Artillery support was eventually brought to bear and the position was overcome during the afternoon.
The Hampshire commanding officer, Lieutenant-Colonel H. D. Nelson-Smith, became a casualty during the fighting and was evacuated to the regimental aid post. This is the sort of event that a tidy operation map cannot show: command arrangements were changing while companies were trying to clear bunkers, snipers and houses, and while casualties were still being moved back across contested ground.
The sea itself was an enemy
Before any of this, men had to survive the approach. Seasickness is easy to reduce to colour in a narrative, but it had a military effect. A man who has spent the approach vomiting, soaked in spray and carrying more than he wants on his back is already physically depleted when the ramp comes down.
On Jig, some men landed in water deep enough to come up to their thighs or higher. Equipment that had been carefully waterproofed became dead weight if a man stumbled. A rifle, ammunition, respirator, entrenching tool, grenades, small pack and additional specialist equipment all mattered ashore; in deep water they could pull a man under.
This becomes especially clear in the story of 47 Royal Marine Commando.
Explore this history

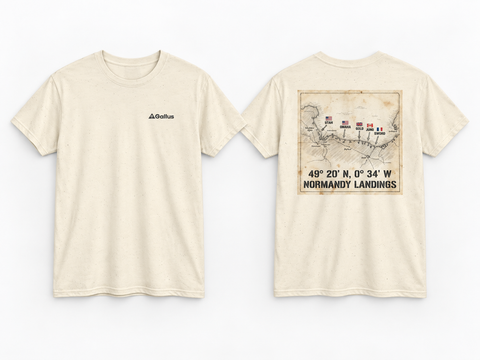
This Gallus design is directly connected to the history covered in this Field Note.
View Gold Beach Coordinates T-Shirt — British D-Day 1944 → | Explore D-Day & Normandy 1944 →
47 Royal Marine Commando: losing the battle before reaching the beach
No. 47 Royal Marine Commando set out for Gold in fourteen LCAs. Their mission was not to seize Le Hamel. They were meant to land, move west around the coastal fighting and reach Port-en-Bessin.
The approach went badly. Five LCAs were sunk and many others badly damaged. Later unit histories describe men abandoning weapons and equipment simply to stay afloat. Some reached shore almost stripped of kit. The Commando's first roll calls showed the unit scattered and badly reduced. A later compiled account gives 431 men setting off, with 28 killed or drowned, 21 wounded and 27 missing in the landing phase, and only 256 moving off the beach at 12:15 before stragglers rejoined later.
Those figures should not be read as neat bookkeeping. The important point is that a unit with a mission many kilometres inland had lost men, radios, heavy weapons and landing craft before it could start the march.
A surviving landing-craft account later described pumps failing as rough water came over the bows and crews struggling simply to keep the craft afloat. It is a later recollection rather than a war diary entry, but it helps explain what "rough seas" actually meant inside a small assault craft.
Specialist armour: not a sideshow
Gold was one of the clearest demonstrations of why the British invested so heavily in specialist assault armour. The beach was full of problems conventional tanks could not solve alone: mines, wire, concrete, soft ground and obstacles intended to rip the bottoms out of landing craft as the tide rose.
Flail tanks beat paths through minefields. AVREs carried demolition charges and specialist engineering equipment. Armoured bulldozers shifted obstructions. Close-support Centaurs added direct fire. DD Shermans were intended to arrive early enough to support the infantry against surviving strongpoints.
Not every vehicle landed where planned and not every piece of equipment worked perfectly. That is not the point. The real comparison is with an infantry battalion trying to solve the same obstacles with hand tools and explosives while under fire. Where specialist armour got ashore and could work with the assault troops, it shortened problems that otherwise would have become killing grounds.
The engineers and the tide
The beach clearance teams had one of the least forgiving jobs on D-Day. They needed to mark and create lanes through obstacles and minefields while the tide was coming in, assault troops were moving through them and German fire was still reaching the beach.
The obstacle belts were designed to become more dangerous as the water rose. A wooden stake, mine or steel obstruction that could be seen and worked on at low water might soon be hidden. A lane not clearly marked could become useless to the following waves. A disabled vehicle in the wrong place could block an exit and produce a traffic jam under fire.
The engineer battle was therefore a race measured in minutes as much as metres.
Getting off Gold
By late morning, parts of the beachhead were developing rapidly. The Green Howards were already moving inland. Other units were still fighting through local resistance. Follow-on brigades had to avoid blocked exits and strongpoints that remained active. Commanders could not wait for every pocket to be eliminated before pushing toward the next objective.
That created a pattern familiar in amphibious operations: bypass what can be contained, destroy what physically blocks the route, and keep the assault moving before the defender can organise a coherent counter-attack.
Inland, the character of the fighting changed. The open beach gave way to villages, walls, orchards and hedgerows. German snipers and small groups left behind could delay traffic and force units to deploy repeatedly. The Green Howards diary records prisoners being sent straight back toward the beach while companies pushed on.
Bayeux: an important correction
One of the common Gold Beach myths is that Bayeux was captured on D-Day. It was not. Patrols reached or entered the outskirts late on 6 June, but the city was secured on 7 June.
That distinction matters because it shows the difference between reaching an objective area and controlling it. By nightfall, 50th Division had made a substantial advance, but it had not completed every D-Day objective. The Bayeux-Caen road was still a key line beyond the full grasp of the assault force.
Longues-sur-Mer
West of the main landing area stood the German naval battery at Longues-sur-Mer, usually identified as WN48. Its four 150mm guns could engage shipping offshore and it became involved in an artillery duel with Allied warships on 6 June.
The battery is sometimes folded into Gold as though infantry stormed it during the first morning. That is misleading. Naval fire and bombardment reduced its effectiveness, but the position was not finally taken until 7 June, when British troops moved in and the surviving garrison surrendered.
The site remains one of the clearest surviving examples of the German coastal defence system because the casemates are still there. It also helps make sense of the naval battle: warships offshore were not firing at an abstract "Atlantic Wall" but at batteries capable of shooting back.
Port-en-Bessin: also not a D-Day capture
The second common correction concerns Port-en-Bessin. The port did not fall on 6 June.
After the disastrous landing, 47 Commando moved inland and west. By the evening its men reached Point 72 south of the port and dug in. The main fight for Port-en-Bessin took place on 7–8 June.
At Point 72, the Commandos found underground accommodation occupied by a small German medical staff and two wounded German soldiers. They were taken prisoner and the dugouts were then used as the Commando regimental aid post. It is a small incident but a useful one because it is documented at unit level and does not need embellishment. The enemy medical staff and wounded men were captured; the accommodation was useful; the war moved on around them.
The following day's battle was savage. The Commandos fought through the town and against fortified cliff positions while German flak craft in the harbour fired into attackers on the slopes. Captain Terry Cousins was killed during the fighting on the eastern feature. By early 8 June the remaining German garrison surrendered and the link with American forces could be completed.
So Port-en-Bessin belongs to the Gold story, but its capture belongs to D+1 and the early hours of D+2, not to the D-Day tally.
The German soldier's side: what we can and cannot say
For Omaha there are well-known German rank-and-file accounts that can be checked against identified positions and units. Gold does not offer the same depth of securely proven individual testimony in readily accessible sources.
That is not a reason to invent balance by dropping in a dramatic anonymous quote. The German side can still be reconstructed from identified units, positions, weapons, captured documents and the evidence of the attacking battalions.
The men in the Gold defences were not one uniform force. Some belonged to static formations, some to Ost units, others to the 352nd Infantry Division. Their positions varied from substantial concrete strongpoints to field works and village fighting positions. Some resisted for hours; some were bypassed; others surrendered once cut off. Allied diaries repeatedly mention snipers, prisoners and surviving machine-gun positions after the first line had been broken.
That is the evidence-led version: German resistance on Gold was real and sometimes fierce, but it was uneven and increasingly fragmented as the British assault broke through the coastal crust.
Command and friction
The operation worked because commanders at every level adapted. A landing plan gives times, lanes, objectives and phase lines. Combat immediately introduces wrecked craft, missing radios, wounded officers, blocked exits, units landing off the intended point and strongpoints that were supposed to be dead but are still firing.
For 47 Commando, the loss of the commanding officer from the immediate picture and severe radio/equipment losses meant Major Patrick Donnell had to take control in a formation already scattered. For 1st Hampshires, the loss of Lieutenant-Colonel Nelson-Smith changed battalion command in the middle of the action. Company and platoon commanders were often working on partial information while trying to keep men moving.
That is why D-Day cannot be explained simply by saying the plan succeeded or failed. The plan got men and firepower to approximately the right place. The result depended on what those men did when reality no longer matched the timetable.
What an infantryman was carrying
A British infantryman coming ashore generally had his battledress, steel helmet, web equipment, ammunition, water bottle, entrenching tool, gas cape or respirator equipment depending on issue and role, rations and his personal weapon. Bren teams, signallers, mortarmen, pioneers and anti-tank crews carried additional loads.
That weight shaped behaviour. Deep water made every unnecessary item dangerous. Once inland, ammunition and water had to be replenished while men were still moving. Radios were precious because a battalion without communications could not call artillery or coordinate movement properly. A drowned wireless set or lost mortar sight was not a small inconvenience; it changed what a unit could do.
47 Commando's equipment losses are therefore more important than the anecdote of men coming ashore in underwear. Losing heavy weapons, radios and demolition stores reduced combat power at exactly the moment the unit needed to march against a fortified harbour.
Casualties: why the totals do not always match
Gold casualty figures vary noticeably between histories. Some widely used summaries give roughly 400 casualties for the 50th Division or for the main Gold assault. Other counts that include attached troops, naval personnel, commandos and fighting connected to the broader Gold operation produce substantially higher totals.
These are not necessarily contradictions. They may be counting different populations and different time windows.
For that reason this Field Note does not pretend that one tidy number covers everyone who fought under the Gold heading. The Hampshires themselves described their losses as heavy. The 47 Commando landing alone cost dozens killed, drowned, wounded or missing before the unit left the beach. Beach engineers, armour crews and naval personnel also suffered losses that can disappear if the count is limited to one divisional return.
The safest conclusion is that Gold was successful at a cost measured in hundreds on 6 June, with further losses in the operations that continued immediately afterward.
6 June timeline
- Before dawn: the invasion fleet closes the Normandy coast while air and naval forces strike German batteries and strongpoints.
- About 06:35: 6th Green Howards record the coast and bombardment in sight.
- About 07:10: their assault companies are in LCAs making the final run.
- About 07:25–07:35: the first main assault waves hit King and Jig according to unit and sector timetables.
- 07:37: the 6th Green Howards diary records A and D Companies assaulting their objectives.
- Morning: King-sector strongpoints are breached; Jig remains harder around Le Hamel. Engineers and specialist armour work to clear exits.
- About 10:00: most of 6th Green Howards are ashore and moving inland. 47 Commando is still reorganising after severe landing losses.
- 12:00: 6th Green Howards report Phase I complete and push toward Crépon.
- 12:15: a later 47 Commando account records 256 men moving off the beach toward the west.
- Afternoon: Le Hamel is finally overcome after prolonged fighting and artillery support; follow-on troops continue inland.
- Evening: the Gold bridgehead is several miles deep and contact is made toward the Canadian sector. Patrols reach the Bayeux area. Arromanches is occupied. 47 Commando digs in south of Port-en-Bessin.
- Night 6/7 June: Bayeux and Port-en-Bessin remain objectives still to be fully secured.
What Gold achieved by nightfall
The most important achievement was not a line on a map but momentum. Roughly twenty-five thousand men had been put ashore in the Gold area, major exits were functioning, the bridgehead had depth, and the British were linked toward Juno. The German coastal defence had been broken into isolated pockets rather than remaining a coherent front.
But the operation had not completed everything. Bayeux still had to be secured. The link with Omaha was not yet made. Port-en-Bessin was still in German hands. Longues-sur-Mer had not yet surrendered. The advance had also fallen short of the full intended line around the Bayeux-Caen road.
That is a more useful description than simply calling Gold a success. It was a strong operational success on 6 June, followed by unfinished work on 7–8 June.
Key personalities
Major-General Douglas Graham commanded 50th (Northumbrian) Division. His formation had extensive combat experience and was expected to turn the beach assault into a rapid inland advance rather than merely hold the coast.
Company Sergeant Major Stanley Hollis VC, 6th Green Howards, became the outstanding individual gallantry story of Gold. His actions were part of the battalion's effort to keep King sector moving.
Lieutenant-Colonel H. D. Nelson-Smith MC commanded 1st Hampshires during the initial fighting and became a casualty in the battle around Le Hamel.
Lieutenant-Colonel C. F. Phillips commanded 47 Royal Marine Commando, whose landing losses temporarily disrupted command. Major Patrick Donnell, the second-in-command, took over as the scattered unit reorganised and moved toward Port-en-Bessin.
Myths and evidence
“The bombardment destroyed the German defences.”
No. Some positions were destroyed or suppressed, but the Hampshire diary explicitly records machine-gun nests surviving air, naval and artillery bombardment.
“Gold was easy compared with Omaha.”
It was less catastrophic than Omaha and the bridgehead developed faster, but parts of Gold involved hard close-range fighting and serious casualties. Comparing beaches should not erase the local battle.
“Bayeux fell on D-Day.”
No. Patrols reached the area, but the city was secured on 7 June.
“Port-en-Bessin was a D-Day capture.”
No. 47 Commando reached the area on 6 June; the main battle was fought on 7 June and concluded in the early hours of 8 June.
“The Atlantic Wall was one continuous concrete line.”
No. Gold shows a mixture of strong concrete positions, field works, mines, obstacles and defended villages. The strength of resistance varied sharply from one sector to another.
Gold Beach today
The ground is unusually readable if visited with a period map. Ver-sur-Mer and the King-sector approaches show how quickly the assault had to move away from the open beach. Le Hamel and Asnelles make the Jig fight easier to understand. Arromanches explains why the coast became such an enormous logistics site once the Mulberry harbour was established. Longues-sur-Mer preserves the casemates of the naval battery. Port-en-Bessin, farther west, makes clear how ambitious 47 Commando's mission was after landing under-strength and short of equipment.
Useful reference points include Gold Beach around Ver-sur-Mer/Asnelles, Longues-sur-Mer battery at approximately 49.343° N, 0.694° W, and Port-en-Bessin at approximately 49.346° N, 0.756° W. Coordinates are given as orientation points rather than pretending every wartime position can be reduced to a modern pin.
Recommended reading
Simon Trew, Gold Beach is the best single-volume starting point for this specific battlefield. Trew's strength is that he treats Gold as its own operation rather than as a few pages between Omaha and Juno. For the soldier-level detail, unit war diaries remain indispensable.
Continue exploring
Explore D-Day & Normandy 1944 → | Gold Beach Coordinates T-Shirt — British D-Day 1944 →
Sources and evidence used
- 6th Green Howards War Diary, June 1944, National Archives reference WO 171/1302.
- 1st Battalion Hampshire Regiment War Diary, June 1944, National Archives reference WO 171/1305.
- 47 Commando — The Advance to Port-en-Bessin, compiled Royal Marines history material drawing on unit records and veteran material.
- 47 Commando — Battle of Port-en-Bessin, 7–8 June 1944.
- The London Gazette, Stanley Hollis VC, issue 36658, 15 August 1944.
- Official British and Allied D-Day histories and order-of-battle material used for brigade assignments, landing plan and wider operational context.
- Simon Trew, Gold Beach, for battlefield synthesis and casualty/context comparison.
Evidence note: War diaries are strongest for what a unit recorded at the time but can still contain errors, rounded timings or incomplete information. Later veteran testimony is valuable for lived experience but is identified as later recollection where used. Casualty totals are kept qualified when sources count different formations or periods.
Related Field Notes
- Operation Overlord 1944: The Road to D-Day — Log 032
- D-Day: Five Beaches Complete Field Guide — Log 033
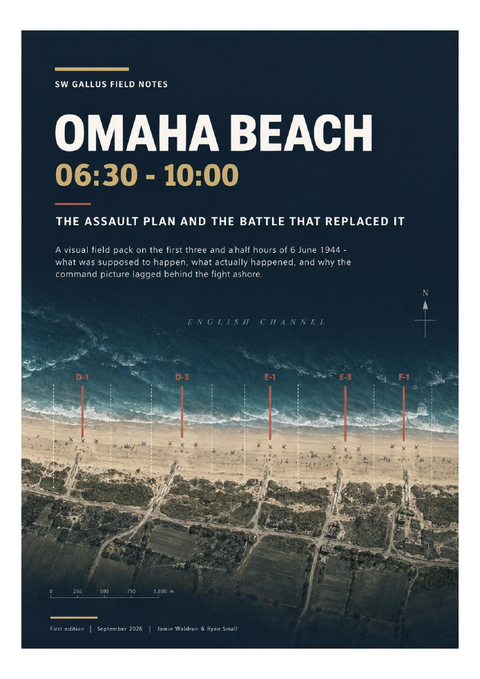
- Omaha Beach D-Day 1944 — Log 053
- Utah Beach D-Day 1944 — Log 054
Gold Beach design: For readers who want the coordinates and battlefield reference on a wearable design, see the Gold Beach D-Day Normandy tribute T-shirt. The history comes first; the design is there for those who want it.
FROM THIS CAMPAIGN
D-Day & Normandy 1944
CONTINUE THE STORY
More from this campaign
Read it, reference it or wear it — the related pieces are kept together here.
FEATURED DESIGN
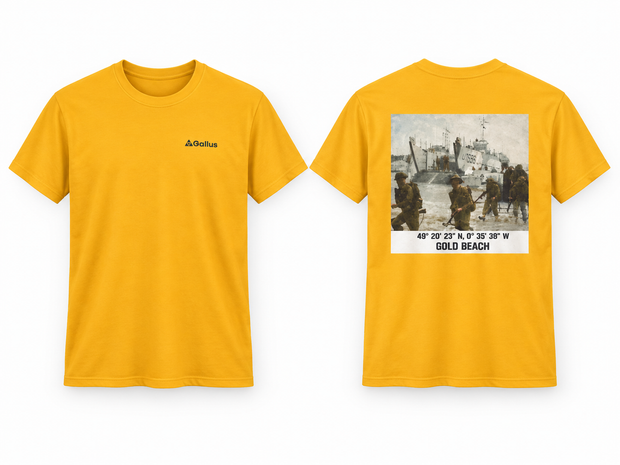
Gold Beach Coordinates T-Shirt — British D-Day 1944
€30,95 EUR
View the design →CAMPAIGN COLLECTION
D-Day & Normandy 1944
Stay with this subject instead of being dropped back into the full catalogue.
Explore the collection →FIELD NOTES
Get new Field Notes by email
New research, campaign guides and useful references without a daily sales barrage.
