


Sword Beach D-Day 1944: British Landings, Ouistreham & the Road to Caen — Complete Field Guide

Field Note 057 · Revision 4
Sword Beach is often remembered through what did not happen. Caen, one of the major objectives of the British 3rd Infantry Division, was not taken on D-Day. That fact is true. It can also flatten everything else that happened on the easternmost Allied assault beach into a single verdict.
For the men coming ashore on 6 June 1944, there was nothing abstract about it. DD Sherman crews were already fighting the Channel before they reached France. Infantry sat in landing craft with seasickness, spray and kit weighing them down. Engineers knew the rising tide was steadily hiding the obstacle belt they were supposed to clear. Once the ramps dropped, the battle became a chain of separate practical problems: surviving the open beach, getting armour through the exits, clearing Hermanville and Colleville, dealing with strongpoints that had survived the bombardment, opening the road inland and keeping enough momentum to reach Caen before German armour could intervene.
Sword was not one battle. It was the assault on Queen White and Queen Red, the fight through the coastal villages, the attack on the Hillman command complex, the French commandos in Ouistreham, the move of Lord Lovat's commandos toward the airborne bridgehead, the struggle around Lion-sur-Mer and the afternoon drive inland. All of those actions affected the timetable.
This Field Note keeps the beach assault separate from two operations that already have their own Gallus deep dives: Pegasus Bridge and Operation Deadstick, and the assault on the Merville Battery. They were part of the same eastern-flank plan, but they deserve to be understood on their own evidence rather than compressed into a paragraph here.
Sword in the invasion plan
Sword was the easternmost of the five main seaborne landing areas. To its west lay Juno and the Canadians. To its east, beyond the River Orne and Caen Canal, British 6th Airborne Division had already landed during the night to seize bridges, disrupt German movement and protect the invasion's vulnerable left flank.
The seaborne assault was made by Major-General Tom Rennie's 3rd British Infantry Division. Its immediate task was to break the coastal defences and establish a secure bridgehead. The larger operational aim was more demanding: make contact with the airborne forces east of the Orne, link west with Juno, and push south toward Caen.
Caen mattered because it was a major road and communications centre. Capturing it early would give the Allies room to manoeuvre and would deny the Germans a natural hub for moving reserves around the eastern side of the bridgehead.
The wider invasion plan is covered in Operation Overlord 1944: The Road to D-Day. The relationship between Sword and the other four landing areas is covered in D-Day: Five Beaches Complete Field Guide.
Where Sword actually was
The name Sword is often applied to a broad stretch of the coast from the Ouistreham area toward Lion-sur-Mer. The main divisional assault, however, was concentrated much more tightly, on roughly two kilometres of beach between Hermanville-sur-Mer and Colleville-sur-Orne, now Colleville-Montgomery.
The two principal assault sectors were Queen White and Queen Red. This matters because the physical frontage was narrow. Once men, tanks, engineer vehicles, artillery, transport and later brigades began coming ashore, the exits became critical. Success on the sand did not automatically mean the force could flow inland at the speed demanded by the plan.
Behind the beach were villages, roads, orchards and defended positions. Farther inland stood Hillman, the German command complex near Colleville. To the east lay Ouistreham and the route toward the airborne bridgehead. To the south lay the road toward Caen.
The British order of battle
Rennie's 3rd Division contained three infantry brigades, supported by armour, engineers, artillery and attached commandos.
- 8th Infantry Brigade led the assault. The 1st Battalion South Lancashire Regiment landed on Queen White, the 2nd Battalion East Yorkshire Regiment on Queen Red, with the 1st Battalion Suffolk Regiment following to deal with inland positions.
- 185th Infantry Brigade was intended to exploit toward Caen. It included 2nd Battalion King's Shropshire Light Infantry, 1st Battalion Royal Norfolk Regiment and 2nd Battalion Royal Warwickshire Regiment.
- 9th Infantry Brigade included 2nd Battalion Lincolnshire Regiment, 1st Battalion King's Own Scottish Borderers and 2nd Battalion Royal Ulster Rifles.
- 27th Armoured Brigade provided armour. The 13th/18th Royal Hussars landed DD Shermans with the assault, with the Staffordshire Yeomanry among the follow-on armoured units.
- Specialist armour included flail tanks of the 22nd Dragoons and AVREs of 5th Assault Regiment, Royal Engineers, part of the extraordinary collection of specialised vehicles associated with 79th Armoured Division.
- 1st Special Service Brigade, commanded by Brigadier Lord Lovat, contained Nos. 3, 4 and 6 Commandos and 45 Royal Marine Commando. No. 4 Commando included the French troops of Commandant Philippe Kieffer.
- No. 41 Royal Marine Commando, part of 4th Special Service Brigade, operated on Sword's western side toward Lion-sur-Mer.
That list can look neat. The beach was not. Units landed at different times, supporting weapons were delayed, exits clogged and some commanders became casualties almost immediately.
The German defence
The troops facing the first assault waves principally belonged to the 716th Infantry Division, including elements of Grenadier Regiment 736 and Ost troops. These were the men in the coastal strongpoints, field positions and command posts when the landing craft approached.
This is worth separating from the later appearance of 21st Panzer Division. The panzers were a mobile reserve inland. They did not sit in the beach bunkers waiting for the first South Lancashires and East Yorkshires to come ashore. The difference matters because the battle changed character during the day: first the British had to crack a static coastal system; later they had to account for a mobile German armoured response.
The German positions were concentrated where they could control exits, roads and approaches. The Hillman complex was particularly important because it served as a command position for Grenadier Regiment 736. It was not simply one more pillbox on the road to Caen.
Before H-Hour: tanks in a rough sea
The 13th/18th Hussars were supposed to give the infantry immediate armoured support. Their DD Shermans could float using a canvas screen and propellers, but the Channel on 6 June was not a parade-ground demonstration.
Their own war diary records the rough sea. Some tanks swam in from offshore while others were brought closer before launching. The key point is that a Sherman crew already had plenty to do before the shooting started: keep a thirty-ton tank afloat, navigate toward the correct sector, avoid landing craft and obstacles, lower the flotation screen at the right moment and then become a conventional fighting tank almost immediately.
Behind and around them came flails, AVREs and engineer teams. Their work was essential. A conventional tank could destroy a firing position if it could reach it. It could not safely drive through an unmarked minefield simply because the timetable said it should.
Queen White: the South Lancashires
The 1st South Lancashires came ashore on Queen White around 07:25. They had barely begun the battle before command friction struck hard. Their commanding officer, Lieutenant-Colonel R. P. H. Burbury, was killed. The battalion suffered well over a hundred casualties during the day's fighting.
Even so, the South Lancashires pushed through the beach defences and toward Hermanville. By around 09:00 the village was in British hands.
That sounds efficient when reduced to two times on a map. It was not clean. Assault companies had to get men across exposed ground, locate weapons that had survived the bombardment, find ways around obstacles and then clear houses and positions beyond the seawall. The fact that the battalion kept moving after losing its commanding officer says something about the depth of junior leadership built into an experienced infantry unit.
A platoon commander or company sergeant major could not wait for a new perfect plan. The next bunker was still firing. The next road still had to be crossed.
Queen Red: the East Yorkshires
On Queen Red, the 2nd East Yorkshires faced a defended sector around the strongpoint commonly identified as WN20, or Cod. Their commanding officer, Lieutenant-Colonel G. F. Hutchinson, was wounded during the action.
The battalion and supporting armour had to reduce positions that could cover the beach and exits. The fighting again demonstrates the value of combined arms. An infantry section could work toward a machine-gun post. A tank could place high explosive or armour-piercing fire onto the position. Engineers could deal with obstacles. Naval and artillery observers could bring heavier fire onto targets farther back. None of those arms replaced the others.
By roughly 09:00 enough of the coastal defence had been broken for the division to begin feeding substantial follow-on forces inland.
The beach exits: success creates its own problem
One of the most important Sword stories is not a dramatic bunker assault. It is traffic.
As the first battalions pushed inland, engineers opened lanes through the obstacles and minefields. By later in the morning several exits were usable. That was a success. It also meant tanks, anti-tank guns, artillery tractors, ambulances, motorcycles, command vehicles, infantry and supply transport were all trying to move through a small number of routes.
Congestion became serious. A damaged tank or truck in the wrong place could close a lane. A mine scare could halt a column. Troops moving forward crossed paths with wounded moving back. Military policemen and beach groups were trying to sort a traffic problem while shells and mortars could still reach parts of the beachhead.
Calling this merely a traffic jam misses the military point. Every delay at an exit translated into a later start for the formation expected to drive on Caen.
The Suffolks and Hillman
The 1st Suffolks, commanded by Lieutenant-Colonel Richard E. Goodwin, followed the assault battalions inland. One of their central tasks became the destruction of the German command complex known to the British as Hillman, near Colleville.
Hillman was a substantial defended position containing buried and reinforced command bunkers, trenches, weapon pits, wire and minefields. It served as a headquarters complex for Grenadier Regiment 736. Its defenders had communication trenches and protected positions rather than one exposed concrete block waiting to be knocked out.
The Suffolks attacked with armour, artillery and Royal Engineer support. The fighting continued for hours.
This is where Sword's timetable began to come apart in a way that mattered operationally. A battalion committed to reducing Hillman was not available to move quickly down the road to Caen. Supporting tanks and guns were also tied to the fight. The position did not need to destroy the entire invasion force to be effective. It only had to consume enough time and combat power to disrupt the planned sequence.
By evening Hillman had been overcome. By then, the hours it had taken could not be recovered.
Explore this history
This Field Note has a directly related Gallus design and a wider campaign collection.
View the related Gallus design → | Explore D-Day & Normandy 1944 →
Ouistreham and the French commandos
On Sword's eastern side, No. 4 Commando included 177 French commandos under Commandant Philippe Kieffer. Their presence carried obvious symbolism: French troops returning in the first wave of liberation. On the ground, their task was still an infantry and commando job under fire.
They fought toward Ouistreham and the harbour area. One of the best-known episodes is the assault associated with the town's casino. The popular image can be misleading. The pre-war casino was no longer standing as an intact Belle Époque building waiting to be stormed. The Germans had fortified the site of the former casino as part of their defensive system.
That correction does not make the fighting less dramatic. It makes it more accurate. The commandos were attacking a German defensive position in a built-up coastal area, using infantry weapons and armoured support where available, while suffering casualties of their own.
Kieffer's men then continued with No. 4 Commando toward the inland rendezvous rather than remaining in Ouistreham for a ceremonial liberation scene.
Lord Lovat and the move to Pegasus
Brigadier Lord Lovat's 1st Special Service Brigade had a mission that linked the beach directly to the airborne battle. Once ashore, the commandos were to move inland and make contact with the troops holding the bridges across the Caen Canal and Orne.
They did so during the afternoon. The story of Piper Bill Millin and Lovat's arrival has become part of D-Day folklore, but the military purpose matters more than the image. The airborne bridgehead was isolated. The commandos represented a physical link from the seaborne army to men who had been fighting since shortly after midnight.
The capture of the bridges themselves is covered in full in Pegasus Bridge 6 June 1944: Operation Deadstick. The separate airborne attack on the German battery farther east is covered in Merville Battery 6 June 1944.
Sword cannot be understood properly without those actions, but neither needs to be retold here.
41 Royal Marine Commando and Lion-sur-Mer
On the western side, No. 41 Royal Marine Commando moved toward Lion-sur-Mer. Its mission helped form part of the intended connection between Sword and the Canadian troops on Juno.
The commandos met stubborn German resistance around the strongpoint commonly identified as WN21, or Trout. The position and the wider fighting around Lion-sur-Mer prevented the tidy same-day coastal link the plan envisaged.
This is another example of how a local strongpoint could have consequences beyond its own perimeter. If one defended position stops a commando unit from moving through, it also affects the link between two divisional beachheads.
The full ground connection toward Juno was not properly completed until the following day.
185 Brigade: the road toward Caen
The 185th Infantry Brigade was the formation intended to turn the beachhead into a rapid drive south. The 2nd King's Shropshire Light Infantry became one of the spearhead battalions.
By early afternoon the brigade was pushing toward Bieville and the ground north of Caen. The advance was real. So were the delays behind it. Traffic had slowed the movement of supporting arms. Hillman was still being fought over. Other German positions had to be contained or cleared. Units that had started the morning as one carefully timed divisional plan were now moving at different speeds.
By late afternoon the leading British troops were still several miles short of central Caen. They were also moving into the zone where German armour could intervene.
21st Panzer Division counter-attacks
The German mobile response came principally from 21st Panzer Division. Its counter-attack is sometimes written as though a single panzer charge stopped the British at the gates of Caen. Reality was more complicated.
Elements of the division moved against the gap between the British and Canadian sectors during the afternoon. German armour and panzergrenadiers threatened the developing Allied bridgehead, and some elements reached the coast between Juno and Sword.
The counter-attack forced British and Canadian commanders to account for a genuine mobile threat at exactly the moment they wanted to drive farther inland. But 21st Panzer was not fighting an isolated invasion force. Allied anti-tank guns, tanks, naval fire, aircraft and the growing mass of troops ashore all limited what the Germans could achieve.
The arrival of the huge Operation Mallard glider lift for 6th Airborne during the evening is often linked to the German withdrawal from the coastal penetration. It certainly demonstrated that more Allied strength was arriving on the eastern flank. It should not be turned into a magical single cause for every German movement. Commanders were also dealing with the risk of being cut off and with the broader failure to throw the invasion back into the sea.
Why Caen did not fall on D-Day
There is no need to invent one reason.
The beach exits were congested. The assault brigades succeeded, but the follow-on formations could not simply pass through them at marching speed.
Hillman and other inland positions consumed time. A defended headquarters complex did exactly what a good defensive position is supposed to do: it forced the attacker to deploy men, tanks, engineers and artillery against it.
The divisional timetable was ambitious. The plan assumed a sequence of events that combat immediately disrupted.
21st Panzer Division intervened. The British advance could no longer be conducted as though only scattered static troops remained ahead.
The eastern-flank mission also mattered. Sword's troops were not all pointed at Caen. Commandos had to make contact with the airborne forces, while other units had to secure the beachhead and western flank.
The failure to capture Caen on 6 June was therefore a genuine failure to achieve an important objective. It does not mean Sword Beach itself failed. By nightfall a powerful British bridgehead existed, the seaborne force had linked with the airborne troops, and tens of thousands of men and thousands of vehicles were ashore. The argument should be about the scale of the shortfall, not whether the landing somehow collapsed.
Caen would remain a central objective through the weeks that followed and was finally secured in July after much heavier fighting than Allied planners had hoped for on 6 June.
The medical and logistics battle
Behind the rifle companies and tanks came the system that made continued operations possible. Regimental aid posts had to establish themselves in villages and behind the exits. Stretcher-bearers moved forward while ambulances tried to move back through the same traffic coming inland.
Beach groups sorted ammunition, fuel, engineer stores, food, water and replacement equipment. Recovery crews dragged damaged vehicles out of lanes. Signals personnel repaired lines and radio links. Military police tried to keep columns moving toward the correct brigade routes.
None of that makes dramatic film footage. Without it, 3rd Division would have become a collection of isolated battalions running out of ammunition and fuel.
The ordinary soldier experienced the logistics system very simply. Is there ammunition when you need it? Is there water? Can the wounded get out? Does the radio work? Has the anti-tank gun arrived before the German tank?
What the men carried
The infantry came ashore carrying more than a rifle. Webbing held ammunition and grenades. There were entrenching tools, water bottles, rations and personal equipment. Bren teams carried the gun, magazines and spare parts. Signallers carried radios and batteries. Mortar teams carried tubes, baseplates and bombs. Pioneers and engineers carried explosives and tools.
That weight mattered in the water. It mattered again when men began moving inland at speed. Seasickness and lack of sleep did not disappear because H-Hour had passed. A soldier who had already spent hours cold and vomiting still had to fight through a village and then march toward the next objective.
That is one reason the timetable on a staff map should never be confused with what the human body could actually deliver under battlefield conditions.
Casualties: what the famous 630 figure actually means
A figure of 630 casualties is widely repeated for Sword Beach. It is useful, but it needs a label.
C. P. Stacey's official Canadian history, when comparing the Commonwealth beach sectors, identifies the only figure then found for Sword as an Army Operational Research Group total of 630 casualties on the beaches. Stacey explicitly notes, by reference to the same problem on Gold, that the figure for the entire day would have been somewhat higher.
That distinction matters. Men were killed and wounded after leaving the sand: at inland strongpoints, on the roads toward Caen, with the commandos and during German counter-attacks. A beach-only figure cannot automatically be used as a complete Sword-sector total.
Other post-war compilations use different formation and time-window definitions and can produce higher totals. Rather than forcing one clean number, the safest statement is this: at least 630 casualties were recorded in the contemporary operational-research beach count, and the full Sword operation on 6 June cost more.
6 June timeline
- Before dawn: 6th Airborne Division is already fighting east of the Orne while the invasion fleet approaches Sword.
- About 07:25: the main assault begins on Queen White and Queen Red. South Lancashires and East Yorkshires come ashore with DD tanks and engineer support.
- Early morning: Lieutenant-Colonel Burbury of the South Lancashires is killed; Lieutenant-Colonel Hutchinson of the East Yorkshires is wounded.
- By about 09:00: Hermanville has been taken and the main coastal positions are sufficiently reduced for follow-on forces to move inland.
- Morning: Kieffer's French commandos and No. 4 Commando fight through the Ouistreham area; 41 RM Commando moves toward Lion-sur-Mer.
- Late morning: the 1st Suffolks turn toward inland strongpoints including Hillman. Congestion on the exits delays elements of the follow-on brigades.
- Early afternoon: 185 Brigade begins its push toward Caen, with the King's Shropshire Light Infantry among the leading troops.
- Afternoon: Lord Lovat's commandos make contact with the airborne bridgehead around Pegasus. Hillman continues to resist.
- Late afternoon: 21st Panzer Division counter-attacks into the gap between Sword and Juno, complicating the British and Canadian advance.
- Evening: the massive Mallard glider reinforcement arrives for 6th Airborne. Hillman's resistance is overcome. German armoured elements withdraw from their coastal penetration.
- Night: Sword is secure as a functioning bridgehead and linked east to the airborne forces, but the full link west toward Juno is incomplete and Caen remains in German hands.
Key personalities
Major-General Tom Rennie commanded 3rd British Infantry Division. His problem was larger than getting men across the beach. He had to turn a successful amphibious assault into a rapid inland operation while the timetable progressively slipped.
Lieutenant-Colonel R. P. H. Burbury commanded 1st South Lancashire Regiment and was killed during the opening assault. His death illustrates how quickly battalion command arrangements could change in the first minutes ashore.
Lieutenant-Colonel Richard E. Goodwin commanded 1st Suffolk Regiment during the attack on the Hillman complex. His battalion's fight became one of the defining inland actions of the Sword sector.
Commandant Philippe Kieffer led the French commandos attached to No. 4 Commando. Their return to France carried enormous symbolism, but their D-Day experience was first and foremost a combat mission.
Brigadier Lord Lovat commanded 1st Special Service Brigade and led the commando move from Sword toward the airborne bridgehead.
Colonel Ludwig Krug was associated with Grenadier Regiment 736 and the German command system centred on Hillman. The complex's ability to delay the British showed the operational value of a well-sited headquarters position prepared for defence.
Myths and evidence
“Sword failed because Caen was not taken.”
Too simple. Caen was an important unachieved D-Day objective. The beach assault itself succeeded, a substantial bridgehead was established and the seaborne force linked with 6th Airborne.
“630 was the total Sword casualty figure for all of D-Day.”
Not safely. The official-history comparison identifies 630 as an Army Operational Research Group beach count and notes that the full-day total would have been higher.
“Kieffer's commandos stormed the intact Ouistreham casino.”
No. They fought a German position constructed on the site of the former casino.
“21st Panzer Division defended the beach.”
No. The principal beach defenders belonged to 716th Infantry Division and associated troops. 21st Panzer was the mobile armoured response from inland.
“Pegasus Bridge and Sword were separate battles.”
Tactically they were distinct actions. Operationally they were deliberately linked: one of Sword's major tasks was to connect the seaborne army with the airborne bridgehead.
“Hillman was just another bunker.”
No. It was a substantial command complex and regimental headquarters position whose resistance tied down a battalion and supporting arms for hours.
Sword today
The battlefield can still be read from west to east and then inland. The main landing ground around Hermanville and Colleville-Montgomery gives a sense of how narrow the assault frontage actually was. The Hillman site inland remains one of the most useful places for understanding why a position that looks modest on a strategic map could consume so much time.
Ouistreham preserves the commando story and the eastern end of the beach operation. Lion-sur-Mer helps explain why the planned same-day link toward Juno proved difficult. Farther east, the Pegasus Bridge area belongs to the same operational plan but is best visited and understood as its own battlefield.
The most useful way to walk Sword is not to look for one famous spot. Follow the sequence: beach, exit, village, inland strongpoint, commando route and the road toward Caen. That route explains the battle better than a photograph taken from the seawall.
Recommended reading
Tim Kilvert-Jones, Sword Beach: British 3rd Infantry Division/27th Armoured Brigade is a strong dedicated starting point for following the ground and the units involved. It is particularly useful alongside unit war diaries and the official campaign histories because it keeps the focus on Sword rather than treating it as a short chapter in a general D-Day book.
Continue exploring
Explore D-Day & Normandy 1944 → | View the related Gallus design →
Sources and evidence used
- 6juin1944 — Sword Beach, for assault sectors, German defenders and broad landing chronology.
- United States Army — Operation Overlord/D-Day history, for the wider Sword objectives, airborne linkage and German armoured response.
- C. P. Stacey, Official History of the Canadian Army in the Second World War, Volume III: The Victory Campaign, casualty comparison appendix, for the qualification attached to the 630 Sword beach-casualty figure.
- 13th/18th Royal Hussars war diary and regimental material, for the DD tank landing and sea conditions.
- South Lancashire and East Yorkshire regimental histories and wartime records, for the Queen White and Queen Red assaults and battalion command casualties.
- 1st Suffolk Regiment and Hillman position records, for the assault on the inland command complex.
- British and French commando records and commemorative sources, for No. 4 Commando, Kieffer's French troops, Ouistreham and the move to the airborne bridgehead.
- Tim Kilvert-Jones, Sword Beach: British 3rd Infantry Division/27th Armoured Brigade, for battlefield-level synthesis.
Evidence note: D-Day timings can vary slightly between war diaries, naval records and later histories because units were using different clocks and because “landing” may mean the first craft touching down, the first ramp dropping or the first troops reaching dry ground. Casualty totals also vary according to whether a source counts only the beach, the entire division, attached commandos or a longer reporting period. Where the evidence does not support a precise figure, this Field Note leaves the figure qualified.
Related Field Notes
- Operation Overlord 1944: The Road to D-Day — Log 032
- D-Day: Five Beaches Complete Field Guide — Log 033
- Juno Beach D-Day 1944 — Log 056
- Pegasus Bridge 6 June 1944 — Log 034
- Merville Battery 6 June 1944 — Log 035
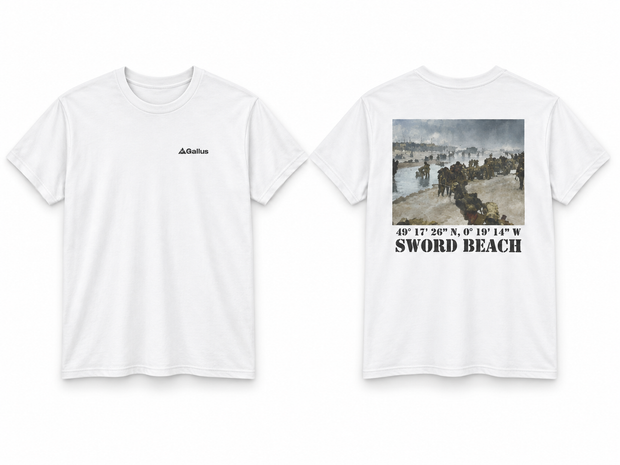
Sword Beach design: For readers who want the beach coordinates and D-Day reference on a wearable design, see the Sword Beach D-Day Coordinates T-Shirt. The history comes first; the design is there for those who want it.
FROM THIS CAMPAIGN
D-Day & Normandy 1944
CONTINUE THE STORY
More from this campaign
Read it, reference it or wear it — the related pieces are kept together here.
FEATURED DESIGN
Sword Beach Coordinates T-Shirt — British D-Day 1944
€30,95 EUR
View the design →CAMPAIGN COLLECTION
D-Day & Normandy 1944
Stay with this subject instead of being dropped back into the full catalogue.
Explore the collection →FIELD NOTES
Get new Field Notes by email
New research, campaign guides and useful references without a daily sales barrage.
