


Battle of Isandlwana 1879: Complete Field Guide — Ground, Order of Battle & Timeline // Log 015
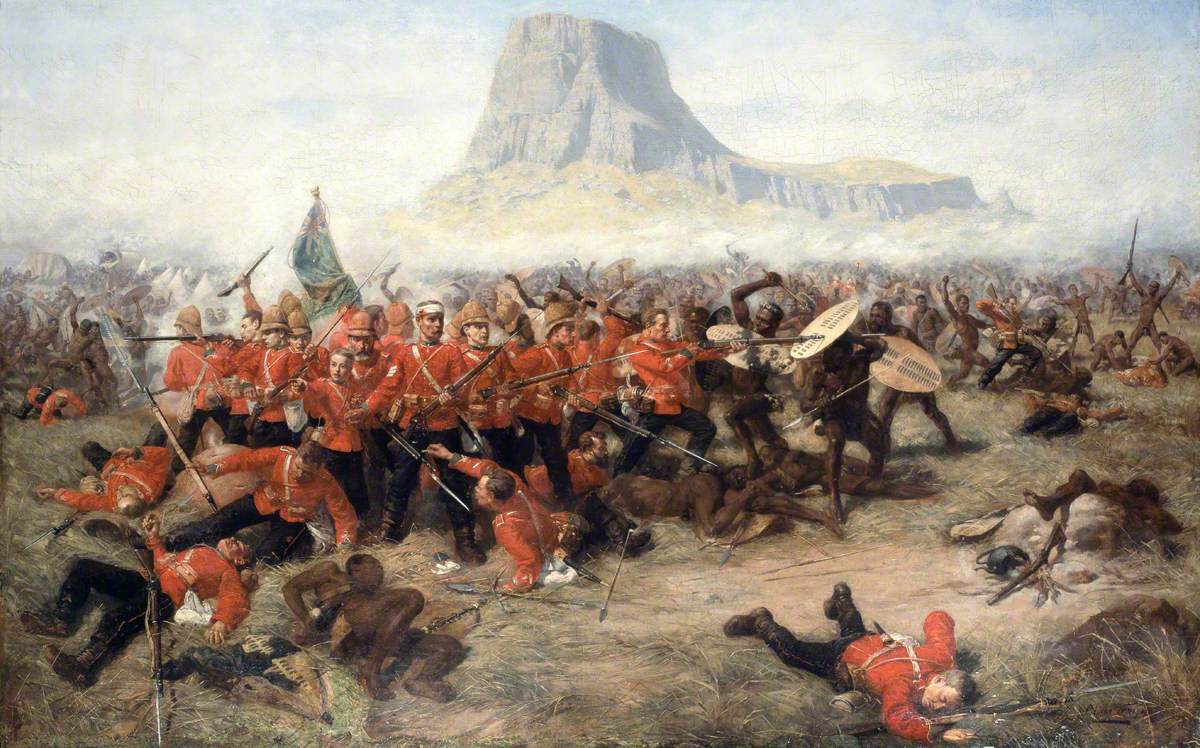
Isandlwana has accumulated explanations in the way battlefields accumulate memorials. The ammunition boxes would not open. Durnford rode off recklessly. Pulleine failed to take command. Chelmsford split the force. The camp was not laagered. The Natal Native Contingent ran. Each explanation contains something worth examining. None, by itself, explains why a British camp containing experienced regular infantry was destroyed so completely on 22 January 1879.
I served 24 years in the British Army, including 1 RRW and 1 and 2 R WELSH, in the later lineage associated with the 24th Foot. My own background included infantry, reconnaissance and CIS. That makes Isandlwana particularly interesting because it is not simply a story about weapons. It is a story about information arriving in fragments, commanders operating at different distances, a defensive line being stretched, and a force discovering too late that the enemy picture it had built was wrong.
The invasion created the problem before the battle began
The war followed a British ultimatum to King Cetshwayo whose conditions were designed to force political change in the Zulu kingdom. When it expired, British columns crossed into Zululand in January 1879. Lord Chelmsford’s central No. 3 Column crossed at Rorke’s Drift and established a temporary camp below Isandlwana hill.
The British expected mobility and firepower to bring the Zulu army to battle on favourable terms. The Zulu command had its own plan. The main army concentrated out of direct British observation north-east of the camp, using broken ground to conceal numbers and movement.
That point matters. The Zulus did not simply appear from nowhere at noon. British patrols and reports had detected movement. What the headquarters lacked was a coherent, timely picture of where the main army actually was and what it intended to do.
The ground
Isandlwana hill is visually dominant and can trick modern visitors into making the battle about the mountain. The decisive ground extends well beyond it.
To the north and north-east lay plateau and broken country that concealed Zulu movement. To the east and south-east, open ground allowed mounted reconnaissance but also gave the Zulu left horn room to sweep around the British right. West of the camp, the saddle and routes towards the Buffalo River became escape corridors after the line failed.

The camp itself was not laagered. That fact later became almost a verdict. It was certainly a lost defensive opportunity, but it needs context. Chelmsford was campaigning offensively and did not expect the camp to become the decisive battlefield while he was away. Wagons were dispersed for transport and supply tasks. A full laager would have required time and labour. None of that makes the decision wise; it explains why it was made.
Chelmsford leaves
Before dawn on 22 January Chelmsford took a substantial force away from the camp after reports suggested Zulus were farther east. Lieutenant-Colonel Henry Pulleine remained responsible for the camp.
This is the strongest level at which responsibility can be discussed without hindsight. Chelmsford was the theatre commander on the ground. He had divided the central column, left the camp unfortified and moved away while the main Zulu army remained unfixed. Whatever later mistakes occurred, the conditions in which they mattered were created by that operational decision.
That is not the same as saying Chelmsford knowingly abandoned the camp to destruction. He believed he was moving towards the enemy he needed to find. The failure was in the picture on which that judgement rested.
Durnford arrives
Lieutenant-Colonel Anthony Durnford arrived later in the morning with mounted troops and a rocket battery. Because he was senior to Pulleine, historians have argued ever since about whether he effectively assumed command of the camp, what his orders required and whether his subsequent movement forward was reckless.
The evidence does not support a simple villain.
Durnford had been ordered towards the camp and was concerned about reported Zulu movement that might threaten Chelmsford’s detached force. He sent mounted men to investigate and moved part of his command outward. That decision widened the British tactical problem, but reconnaissance was not an irrational response to uncertain enemy movement.
What became dangerous was the distance between elements and the speed with which reconnaissance turned into a general engagement.
The army is found
Zulu forces were discovered on or beyond the plateau north-east of the camp. Once exposed, the army deployed rapidly into the familiar broad encircling formation conventionally described as the horns of the buffalo.
The centre advanced on the British line. The Zulu right moved around the British left and behind Isandlwana. The left horn pressed across the open ground against Durnford’s mounted troops and towards the British right. The reserve remained farther back before elements later moved towards Rorke’s Drift.
This was not a mindless rush. The Zulu army had assembled, concealed itself, deployed on a large frontage and continued manoeuvring under disciplined rifle and artillery fire. British accounts understandably focus on what the 24th did. Any serious explanation has to give equal weight to what Ntshingwayo kaMahole and the Zulu commanders made their own men do.
The firing line worked — for a while
Companies of the 24th moved forward from the tents onto an extended line. Their Martini-Henry fire inflicted heavy casualties and slowed portions of the Zulu centre.
This is important because it undermines the idea that British infantry simply failed to fight effectively. They did fight effectively. The tactical system worked while its assumptions held: identifiable enemy to the front, ammunition reaching companies, flanks not yet turned and enough space to maintain a coherent line.
The difficulty was that the line was long and the enemy was not only in front.
The ammunition-box myth
For decades one of the most persistent explanations was that screws on ammunition boxes could not be removed quickly enough, starving the firing line of cartridges until the Zulus broke through.
It is a satisfying story because it converts catastrophe into one absurd administrative mistake.
The evidence does not justify making it the main cause.
Ammunition distribution became difficult. Companies were dispersed. Regimental and company arrangements could slow resupply. Men sent back to wagons had to find the correct stores in an increasingly chaotic camp. Durnford’s mounted troops had their own ammunition problem. But there is evidence of boxes being opened and ammunition reaching the line. The broader failure was not that thousands of cartridges sat permanently trapped behind screws.
The real problem was distance and time. A firing line hundreds of yards forward consumes ammunition while the enemy keeps moving. Every resupply journey becomes longer. If one part of the line withdraws, the routes and relationships of everyone beside it change. The ammunition problem was part of the collapse, not a magic switch that caused it.
Durnford’s withdrawal
Durnford’s mounted men fought from a donga on the British right. Under increasing pressure and with ammunition becoming a concern, they withdrew towards the camp.
Older blame narratives often treat this as the moment Durnford “exposed” the 24th and caused the defeat. That is too neat. His withdrawal certainly changed the right flank. It forced adjacent infantry to respond and contributed to the contraction of the line. But the Zulu horns were already working around a position whose frontage was too broad to remain stable indefinitely.
Durnford’s action was one event inside a collapsing geometry, not the single cause of it.
Pulleine
Henry Pulleine is harder to assess because he did not survive to explain his decisions. That simple fact shaped much of the later argument. Chelmsford wrote. Durnford became a convenient subject of posthumous controversy. Pulleine left no defensive memoir.
He deployed companies to meet the attack and they initially fought successfully. The criticism is that the line was too extended and too far from a compact camp defence. That is fair with hindsight. The harder question is whether Pulleine understood, at the point those deployments were made, that he was facing essentially the main Zulu army rather than a large but manageable force on one sector.
We should be wary of giving a commander information before he actually possessed it.
The NNC and the temptation to blame the men who survived
African troops of the Natal Native Contingent have often been treated dismissively in older accounts, sometimes blamed for breaking first and triggering collapse. The NNC was unevenly armed and trained compared with the 24th and some elements did indeed give way.
But treating that as the explanation for Isandlwana shifts attention away from the command decisions that placed the force in its position. An auxiliary formation with limited firearms was never going to perform like a British regular battalion under a massed encircling attack. If the survival of the entire camp depended on it doing so, the problem was already larger than the NNC.
Why the line actually broke
There probably was no single cinematic instant.
The British position degraded. Durnford’s men withdrew. Portions of the infantry line had to pull back. Ammunition movement became harder. Zulu pressure continued around both flanks. Once companies began moving, intervals and fields of fire changed. Orders had to travel across a dispersed battlefield. Men who had been firing from one relationship to their neighbours suddenly found those neighbours somewhere else.
That is how command-and-control tends to fail. Not because everybody simultaneously forgets what to do, but because each local decision makes the next local decision harder.
When the Zulus finally closed the distance, the British advantage in long-range fire shrank dramatically. The battle fragmented into company and small-group stands among tents, wagons, dongas and the saddle. At that stage the numerical imbalance became overwhelming.
What about the laager?
Had the wagons been formed into a compact laager, the Zulus would have faced something closer to the Rorke’s Drift problem: a smaller perimeter with concentrated fire and fewer exploitable gaps.
It is therefore reasonable to say that failure to fortify materially increased British vulnerability.
It is not reasonable to say a laager automatically guarantees victory. The camp contained many men, animals and wagons; the force was larger and the terrain different; the main Zulu army was vastly stronger than the reserve that attacked Rorke’s Drift. A laager changes the battle. We cannot run the alternative battle to its conclusion.
What the Zulus did right
One of the least useful traditions in writing Isandlwana is to explain the British defeat entirely through British mistakes.
That accidentally removes the winner from the battle.
The Zulu command concealed the main army, used terrain, deployed rapidly when discovered, absorbed serious casualties, maintained movement under fire and kept both horns working around the British position. Individual regiments did not move with machine-like perfection and later recollections differ on exact placements, but the operational achievement remains.
The British were not defeated only because they made mistakes. They were defeated because the Zulus exploited them.
What the evidence can support
Known: Chelmsford divided No. 3 Column and left the camp before the main battle; the camp was not laagered; the main Zulu army was concealed north-east of the position; British companies initially checked the attack with disciplined rifle fire; the Zulu horns moved around both flanks; the British line then withdrew and collapsed.
Probable: no single ammunition failure caused the defeat. Resupply difficulty, over-extension, flank pressure and loss of cohesion interacted.
Probable: Chelmsford bears the greatest operational responsibility because the decision to divide the force and the faulty enemy picture created the conditions in which later tactical errors became fatal.
Plausible: a compact laagered position would have been significantly harder to defeat, but its ultimate survival cannot be known.
Unresolved: the exact command relationship between Pulleine and Durnford at every stage, the precise moment and sequence of company withdrawals, and the exact placement of several Zulu regiments.
Unsupported: the simple claim that unopened ammunition boxes, Durnford alone, or the NNC alone “caused” Isandlwana.
The strongest counterargument
The strongest case against this multi-causal reading is that it can become so nuanced that responsibility disappears. Chelmsford did split the column. Durnford did move forward. Pulleine did deploy an extended line. The camp was not fortified. At some point commanders have to own decisions.
Agreed. Nuance should not become an alibi.
But responsibility exists at different levels. Chelmsford made the operational decision that exposed the camp. Pulleine and Durnford then had to solve a rapidly changing tactical problem with incomplete information. Individual decisions can be criticised without pretending each man saw the battlefield from the viewpoint we now enjoy on a map.
What would change our mind?
A newly authenticated contemporary account from Pulleine’s headquarters would be enormously important, particularly if it clarified the orders exchanged with Durnford or the timing of withdrawal. New Zulu testimony with secure provenance could alter regimental placements and command interpretation. Archaeological work tying cartridge concentrations and firing positions to precise phases could also test modern line reconstructions.
The largest weakness in the surviving record is not lack of British material. It is the imbalance between a very large British documentary tradition and a much smaller surviving contemporary Zulu record.
Scholarly Challenge
Gallus welcomes substantive criticism of this reconstruction. Historians, archaeologists, archivists and other specialists are invited to examine the primary sources cited, challenge the methodology, offer alternative readings of the command problem, compare manuscripts or testimony, and reassess the battlefield topography. Where appropriate, and with permission, substantial commentary may be summarised or referenced in future updates.
Continue the archive
Read the Anglo-Zulu War campaign hub, then continue to Rorke’s Drift. Biographies include Lord Chelmsford, Anthony Durnford, Henry Pulleine and Ntshingwayo kaMahole.
Wear the history
- Isandlwana 22 January 1879 T-Shirt
- Isandlwana Battlefield Map T-Shirt
- Isandlwana 22.01.1879 Hoodie
- Rorke’s Drift & Isandlwana T-Shirt
