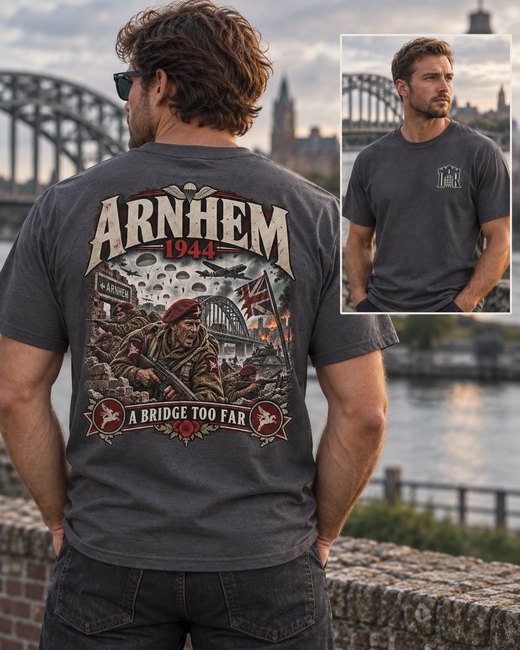
Arnhem 1944: Complete Field Guide — Market Garden, The Bridge & Oosterbeek // Log 065

Field Note // Log 065
Arnhem has become shorthand for a plan that reached too far. That verdict is understandable, but it can hide how close parts of the operation came to working and how many separate problems had to stack up before the northern bridge became unreachable.
The short answer
Operation Market Garden began on 17 September 1944. Three Allied airborne divisions were to seize a chain of bridges through the Netherlands while Lieutenant-General Brian Horrocks’s XXX Corps drove north along a narrow corridor to cross the Lower Rhine at Arnhem. The American 101st Airborne Division landed in the south, the 82nd around Nijmegen and the British 1st Airborne Division, later reinforced by the Polish 1st Independent Parachute Brigade, around Arnhem.
The southern part of the corridor was opened, but Arnhem failed. Only Lieutenant-Colonel John Frost’s 2nd Battalion and attached troops reached the main road bridge in strength. The rest of the British division became concentrated around Oosterbeek. After more than a week of fighting, surviving troops south of the river were withdrawn on the night of 25–26 September.
The ambition
After the breakout from Normandy, Allied armies advanced rapidly across France and Belgium. Supply lines were stretched and German resistance appeared disorganised. Field Marshal Bernard Montgomery proposed a concentrated thrust through the Netherlands to cross the Rhine and turn the northern end of Germany’s defensive line.
The concept was bold rather than irrational. The problem was that success depended on a long sequence working on time: bridges had to be captured intact, airborne forces had to hold them, German reaction had to remain manageable, weather had to allow reinforcement, and XXX Corps had to keep moving along a single main road.
The landing zones
At Arnhem, the main British landing and drop zones were roughly 11 kilometres from the bridge. Reasons included terrain, anti-aircraft threats and the need for suitable large areas for gliders and parachutes. On a planning map that distance looked manageable. Against a reacting enemy, it became decisive.
Only Frost’s group fought its way to the bridge. Other battalions were blocked, diverted or drawn into fighting west of the city. The 1st Airborne Division’s commander, Major-General Roy Urquhart, temporarily lost contact with his headquarters while moving forward to understand the situation.
The Germans were not finished
Allied intelligence knew elements of II SS Panzer Corps were in the Arnhem area refitting. The exact combat strength and implications remain part of the long argument over Market Garden intelligence. What matters on the ground is that the Germans found enough experienced headquarters, armour, assault guns and infantry to organise a faster and stronger response than the airborne troops needed.
This was not a fully restored panzer corps charging at full strength. It did not need to be. Lightly armed airborne troops had limited anti-tank weapons and little heavy artillery. Even a small number of armoured vehicles could dominate roads and force defenders to use scarce anti-tank guns carefully.
Wireless — bad, but not the whole explanation
British radio communications at Arnhem were poor. Range, terrain, frequency planning, equipment performance and operating conditions all contributed. Messages moved slowly or not at all. That made it harder to coordinate scattered battalions and call support.
It has become tempting to say “the radios did not work, therefore Arnhem failed.” That is too simple. Better communications would have helped enormously, but they would not have moved the landing zones closer, cleared the road from Eindhoven, repaired weather, or removed German armour.
The bridge
Frost’s force held the northern end of Arnhem road bridge for several days. Their position became increasingly isolated. Ammunition, water and medical supplies ran down. Buildings burned. German attacks came from several directions, and relief from the south did not arrive.
The famous phrase “a bridge too far” gives the battle its title in popular memory, but the bridge fight was only one part of the division’s experience. Most of 1st Airborne never reached it.
Oosterbeek
West of Arnhem, airborne troops formed a shrinking defensive pocket around Oosterbeek. The fighting became a close battle of houses, woods, gardens and road junctions. German artillery and mortars compressed the perimeter. The lightly armed defenders relied on British artillery south of the Rhine when communications allowed, along with limited supplies delivered by air — many drops fell into German-held areas.
Civilians were trapped in the battle. Dutch homes became aid posts and strongpoints. Afterward, much of Arnhem and Oosterbeek was evacuated, adding a civilian aftermath often missing from purely military accounts.
The road north
XXX Corps was advancing along a narrow raised road that could be cut at multiple points. Every destroyed bridge, traffic jam, anti-tank ambush or counter-attack created delay. Engineers had to repair crossings while the entire operation’s timetable kept running.
Nijmegen’s road bridge was not captured until 20 September after a hard fight that included the 82nd Airborne Division’s Waal crossing. By then Frost’s position at Arnhem was near collapse.
The Polish brigade
Major-General Stanisław Sosabowski’s Polish 1st Independent Parachute Brigade was delayed by weather and eventually dropped south of the Rhine near Driel. Attempts to reinforce or evacuate across the river were made under difficult conditions. Sosabowski later became a convenient target for criticism, and post-war reassessments have treated him far more fairly than some contemporary British accounts did.
Withdrawal
By 25 September the Oosterbeek position could no longer serve the original purpose of holding a Rhine crossing. Operation Berlin — the evacuation, not to be confused with the 1945 battle — pulled about 2,100 survivors across the river during the night, according to National Army Museum figures. The same source estimates roughly 7,500 of the British and Polish force at Arnhem were killed or captured.
Myth check
“One intelligence officer warned about the panzers and was ignored, causing the whole defeat.” Intelligence about German armour was important, but Arnhem failed through several interacting factors. Single-cause explanations are attractive because they are simple, not because they are complete.
“The radios caused everything.” Communications failure was serious, not sufficient as a complete explanation.
“Market Garden achieved nothing.” The operation liberated substantial Dutch territory and captured important crossings farther south, but it failed in its decisive aim of securing a bridgehead across the Lower Rhine.
Why Arnhem still matters
Arnhem is a useful study in operational dependence. Every military plan has assumptions. Market Garden had many of them, linked in sequence. When delays accumulated, success at one bridge could not compensate for failure farther north.
At soldier level, none of that made the fighting less direct. Airborne troops were isolated, short of heavy weapons and holding ground long after the original timetable had collapsed. That is why the story still has power even after the myths are stripped away.
Sources & further reading
- National Army Museum — Operation Market Garden
- Cornelius Ryan, A Bridge Too Far.
- Antony Beevor, Arnhem: The Battle for the Bridges, 1944.
- Martin Middlebrook, Arnhem 1944.
Continue through the archive
Return to the Second World War & Remembrance hub or read the complete Second World War campaign guide.
Related design: Arnhem 1944 WW2 T-Shirt.
SHOP THIS FIELD NOTE
 Arnhem 1944 WW2 T-Shirt | Operation Market Garden History Tee€29,95 EURView design →
FIELD GEAR
From this Field Note
The products below are the designs already linked to this article. Prices are shown in the currency selected for your market.