


Battle of Balaclava 1854: Complete Field Guide — Thin Red Line, Heavy Brigade & Light Brigade
Balaclava, 25 October 1854. The Battle of Balaclava is remembered almost entirely through the Charge of the Light Brigade. That is understandable, but incomplete. The day also included the Russian assault on the Ottoman redoubts, the stand later called the Thin Red Line, and the Charge of the Heavy Brigade. Read together, those actions show a battlefield shaped by broken ground, exposed cavalry, confused command relationships and a sequence of local crises rather than one single dramatic charge.
At a glance
- Date: 25 October 1854.
- War: Crimean War.
- Location: Balaclava, Crimea.
- Main Allied forces: British, French and Ottoman troops.
- Russian aim: threaten the Allied base and communications around Balaclava.
- Best-known actions: the Thin Red Line, Charge of the Heavy Brigade, Charge of the Light Brigade.
Why Balaclava mattered
The Allied armies were besieging Sevastopol and depended on vulnerable supply arrangements from the coast. Balaclava was therefore more than a picturesque harbour behind the lines. It was part of the logistical system sustaining the British army. A serious Russian success around the approaches could disrupt supply, force the Allies to divert troops and potentially compromise the siege.
That context matters because the battle was not originally about cavalry glory. It was about protecting a base, routes and high ground.
The ground
Balaclava sat behind a battlefield divided by ridges, valleys and a chain of defensive positions. The Causeway Heights and surrounding redoubts helped control movement across the area. The terrain also divided observation. Commanders could see parts of the battlefield while other parts were screened by folds in the ground.
That became crucial later. An order that looked clear from one observation point could be interpreted differently by a commander looking at a different part of the valley. The famous confusion before the Light Brigade charge cannot be understood properly without the terrain.
The Russian attack on the redoubts
Russian forces attacked Ottoman-held positions on the Causeway Heights early in the battle. Several redoubts were taken, opening the possibility of further pressure toward Balaclava and exposing the weakness of the outer Allied defensive system.
The Ottoman defenders are often reduced to a prelude in British retellings, but they were part of the battle from the opening stages. Their positions absorbed the first major Russian attacks and shaped what British commanders then had to respond to.
The Thin Red Line
Near Balaclava, the 93rd Highlanders under Sir Colin Campbell formed to meet approaching Russian cavalry. Rather than forming the conventional infantry square associated with defence against cavalry, Campbell deployed a thinner line.
The Russian cavalry did not crash straight through it. The British infantry delivered disciplined volleys and the Russians turned away. The later phrase “Thin Red Line” became one of the most durable images of Victorian military history.
The real lesson is less theatrical: trained infantry, steady fire discipline and confidence in the ground can make a formation look stronger than its depth suggests.
The Charge of the Heavy Brigade
Another Russian cavalry movement was met by the British Heavy Brigade under Brigadier-General James Scarlett. The Heavy Brigade counter-charged uphill into a larger Russian body and drove it back.
This action deserves more attention than it usually gets. It was tactically successful, aggressive and conducted in difficult circumstances. Yet public memory has overwhelmingly favoured the later disaster of the Light Brigade.
Command friction
The British cavalry command structure was strained by personality and poor relationships. Lord Lucan commanded the Cavalry Division; Lord Cardigan commanded the Light Brigade. Their mutual dislike was already well established.
Above them, Lord Raglan observed the battle from higher ground. His view of the Russian movement and captured guns was not the same as the view available to Lucan and Cardigan in the valley. Orders then passed through staff officer Captain Louis Nolan.
This is the key point: the failure was not simply that one officer “got it wrong”. The command system allowed ambiguity to survive all the way from intent to execution.
The order to the Light Brigade
Raglan wanted cavalry action against Russian efforts involving captured guns. The written order, however, did not identify the exact battery as clearly as later hindsight makes it seem. Nolan delivered the message to Lucan, and the exchange that followed did not remove the ambiguity.
Lucan then directed Cardigan to advance down the North Valley against the Russian guns visible at the far end.
The Charge of the Light Brigade
The Light Brigade advanced with the 4th and 13th Light Dragoons, 17th Lancers, 8th Hussars and 11th Hussars. Russian guns and troops could engage from the front and flanks as the brigade moved down the valley.
The charge reached the guns and some cavalrymen fought beyond the battery, but the brigade had no realistic way to hold the position. Survivors had to ride back through the same beaten ground.
The action demonstrated courage, discipline and extraordinary endurance at individual and regimental level. It was also the product of a command failure that sent cavalry against a position without a coherent operational purpose.
What went wrong?
- Observation: Raglan and the cavalry commanders did not share the same view of the ground.
- Language: the order was not specific enough for the tactical picture below.
- Command relationships: Lucan and Cardigan already had a dysfunctional professional relationship.
- Confirmation: ambiguity was not resolved before execution.
- Terrain: folds in the ground hid the intended objective from men lower in the valley.
Balaclava is therefore one of the clearest historical examples of why intent must survive transmission. A brave unit cannot repair a badly communicated task simply by executing it harder.
Casualties and aftermath
The Light Brigade suffered severe losses in men and horses, though it was not annihilated. The battle itself did not produce the decisive Russian breakthrough that had been possible earlier in the day, and Balaclava remained in Allied hands.
The wider Crimean War continued until 1856. Balaclava entered British memory because art, reporting and poetry transformed the Light Brigade into a symbol of courage under disastrous orders.
Myth versus battle
The popular memory tends to compress the entire day into a single valley and a single cavalry charge. The battle was broader. The Ottoman redoubts, Highland infantry and Heavy Brigade all mattered. The Light Brigade charge was one episode inside a much larger tactical problem.
That distinction is important for Gallus Field Notes: remembrance should not flatten history. The men who rode in the charge deserve to be remembered, but so do the troops whose actions stopped the Russian attack elsewhere on the field.
Wear the history
Balaclava 1854 Battle Scene T-Shirt →
Sources & further reading
CONTINUE THE STORY
More from this campaign
Read it, reference it or wear it — the related pieces are kept together here.
FEATURED DESIGN
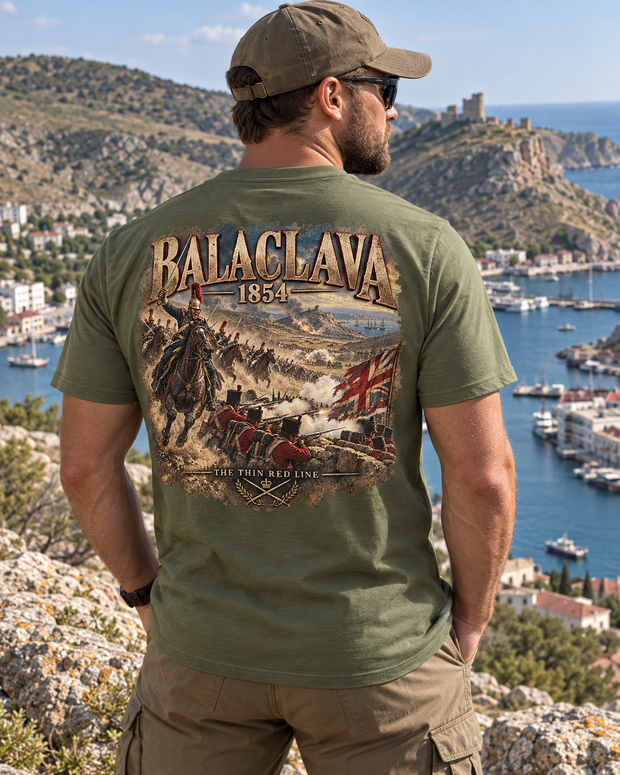
Balaclava 1854 Battle Scene T-Shirt — Crimean War
€29,95 EUR
View the design →FIELD NOTES
Get new Field Notes by email
New research, campaign guides and useful references without a daily sales barrage.
